

Bradley Hamilton
Lakeside Painting
Part 1: Understanding Wallpaper Types (And Which Actually Works in NZ)
Not all wallpaper is created equal. And what works in a temperature-controlled London flat definitely doesn't work in a Wanaka home that swings from -5°C to 30°C.
The Main Types You'll Encounter
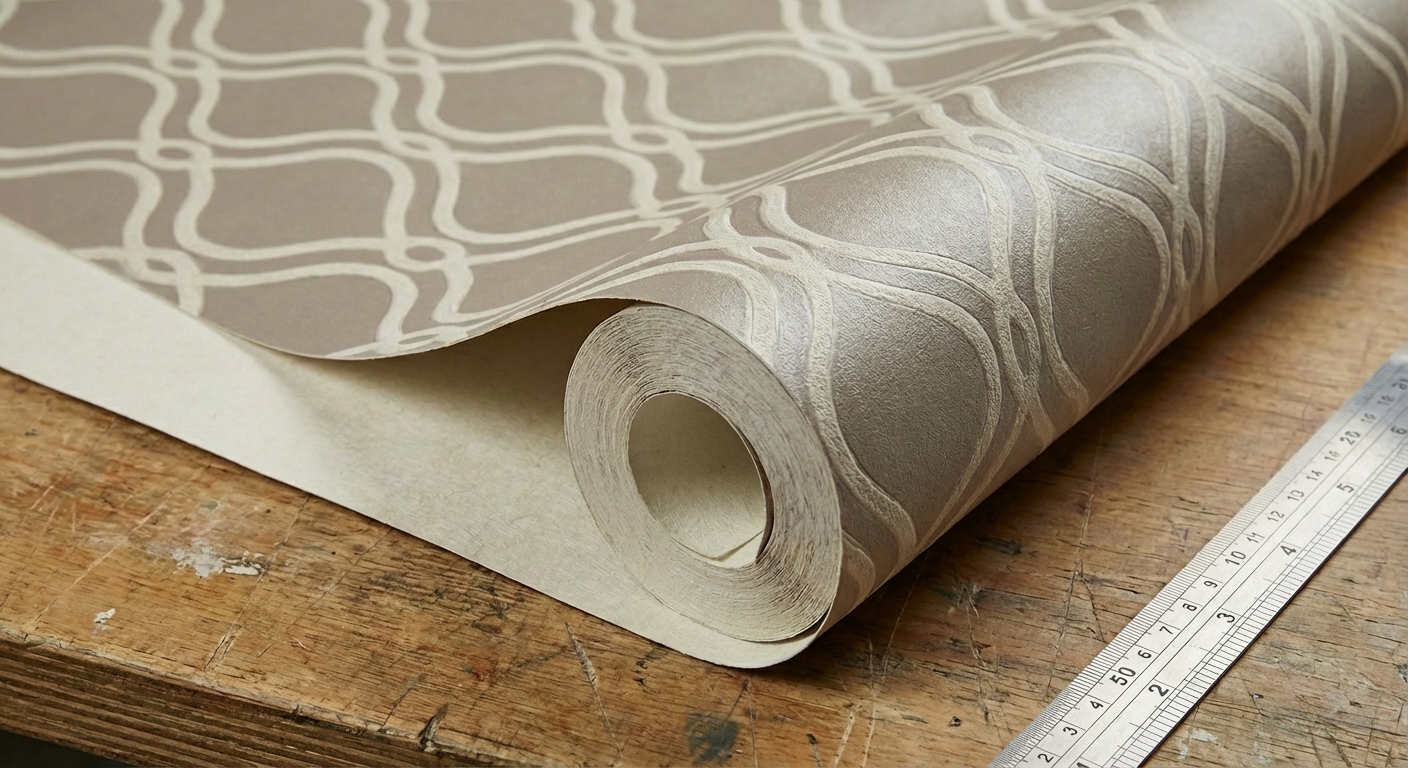
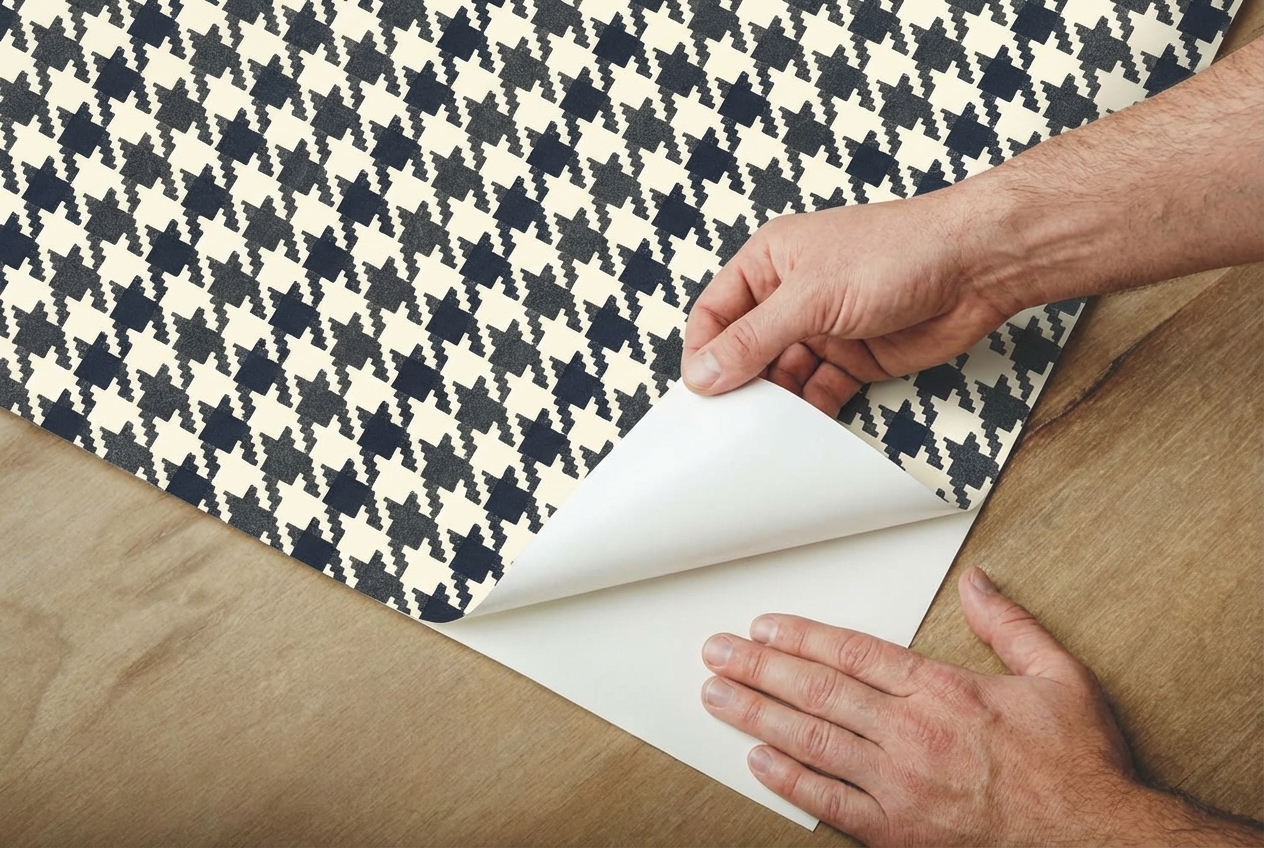
Vinyl Wallpaper The workhorse of the wallpaper world. A paper or fabric backing with a vinyl (PVC) surface layer.
Pros
- Incredibly durable
- Wipeable
- Moisture-resistant
- Hides minor wall imperfections
Cons
- Can look a bit plasticky on close inspection
- Not breathable (can trap moisture in walls)
Best for
Kitchens, bathrooms, hallways, kids' rooms, rentals
NZ climate verdict:
Excellent choice for most applications. Handles our humidity swings well.
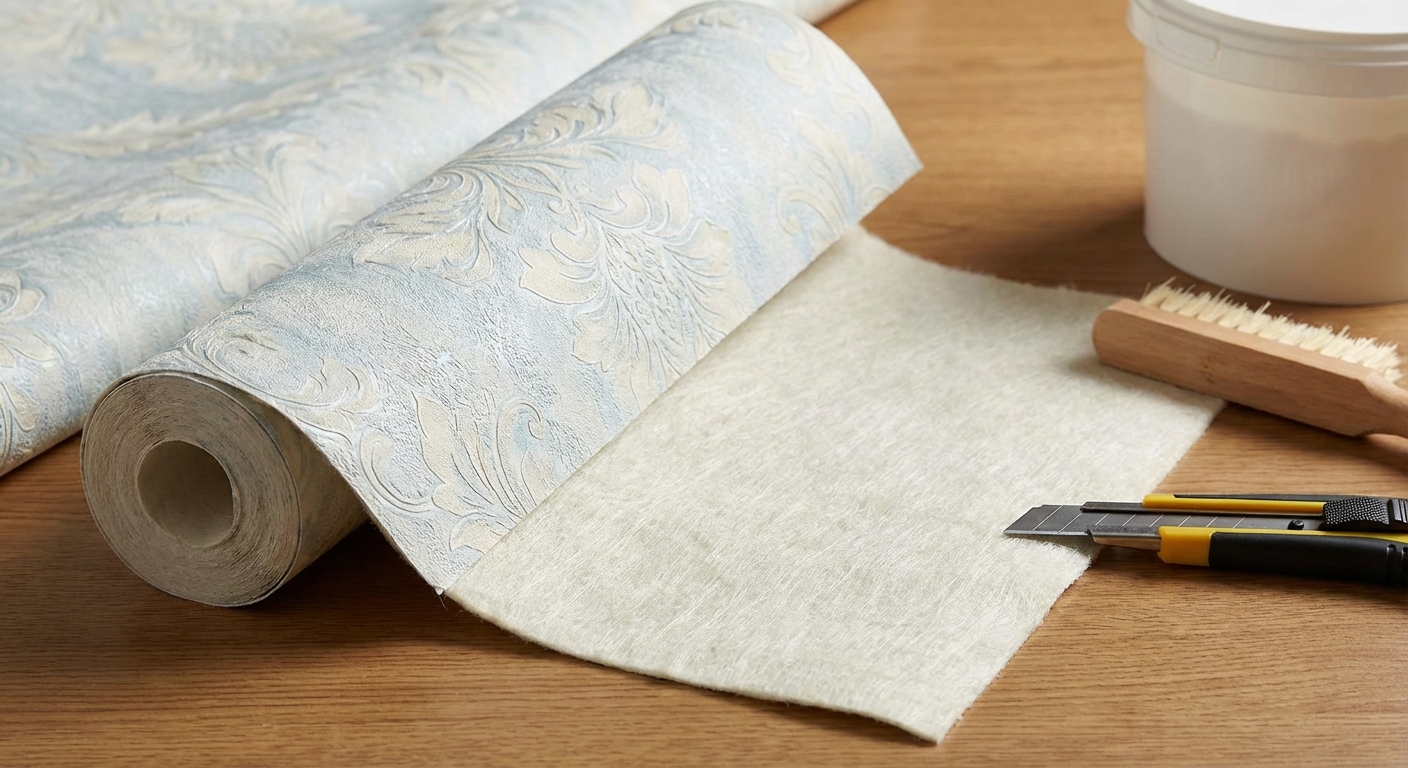
Non-Woven (Fleece-Backed) Wallpaper The modern standard for quality wallpaper. Made from a blend of natural and synthetic fibres.
Pros
- Dimensionally stable (won't shrink or expand)
- Paste-the-wall application (faster, less mess)
- Easy to remove later
- Breathable
Cons
- Less forgiving of wall imperfections than vinyl
- Slightly more expensive
Best for
Living rooms, bedrooms, dining rooms, feature walls
NZ climate verdict:
My top recommendation. The dimensional stability is crucial for our temperature extremes.
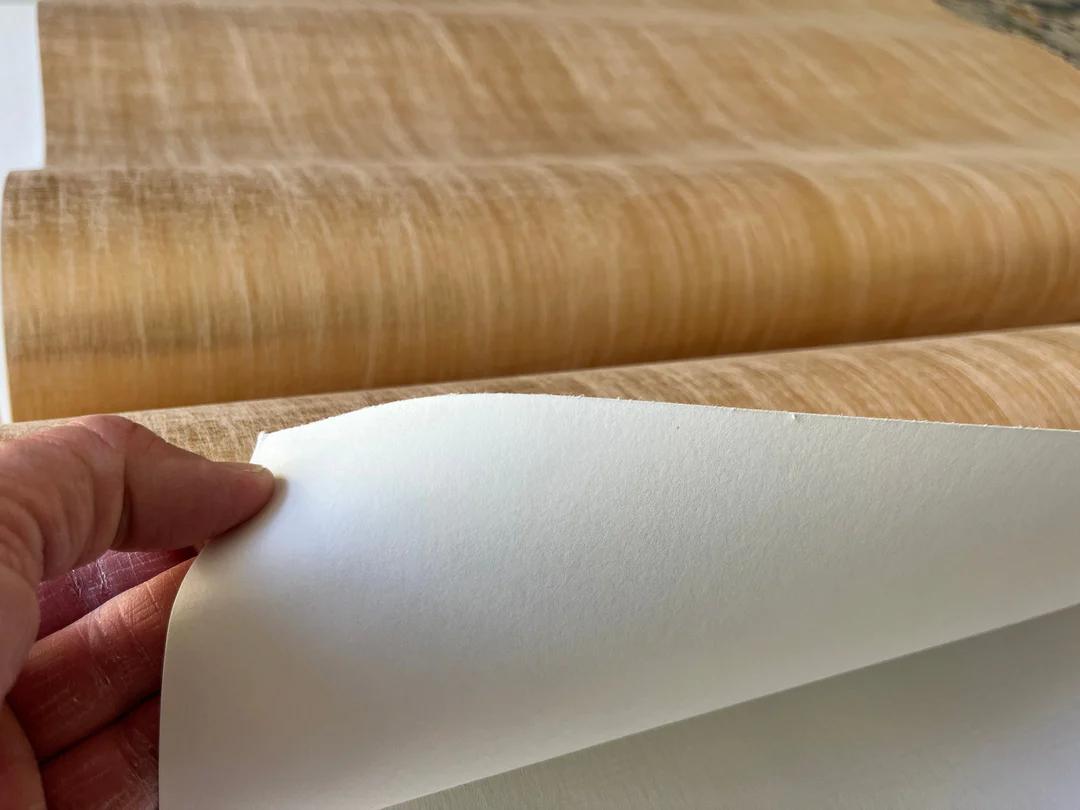
Traditional Paper-Backed Wallpaper The old-school option. Paper front and back.
Pros
- Often beautiful designs
- Good colour depth
- Environmentally friendly
Cons
- Expands when wet (tricky to hang)
- Shrinks when dry (seams can open)
- Harder to remove
Best for
Heritage restorations, specific design requirements
NZ climate verdict:
Risky in Central Otago. Our dry winters cause significant shrinkage. I've seen seams open up 2-3mm on paper-backed wallpaper within a single season.
Grasscloth and Natural Textured Wallpapers Made from woven grasses, jute, sisal, or other natural materials on a paper backing.

Pros
- Stunning texture and warmth
- Unique natural variations
- Adds acoustic dampening
Cons
- Expensive
- Stains easily
- Seams always visible (by design)
- Difficult to clean
Best for
Feature walls in low-traffic areas, dining rooms, home offices
NZ climate verdict:
Works well in stable environments. Avoid in rooms with large temperature swings or direct sun exposure.
Peel-and-Stick (Removable) Wallpaper Self-adhesive wallpaper that doesn't require paste.
Pros
- Easy to apply and remove
- Great for renters
- Repositionable during installation
Cons
- Often lower quality prints
- Can peel in humid conditions
- Limited pattern selection
Best for
Temporary installations, rentals, accent walls, trial runs before committing
NZ climate verdict:
Mixed results. The adhesive can fail in our dry winters. Fine for temporary use, but don't expect it to last more than 2-3 years.
My Honest Recommendation
For 90% of jobs in Central Otago, I use non-woven wallpaper. Here's why:
- Dimensional stability - It doesn't shrink or expand with our mental temperature swings
- Paste-the-wall application - Faster installation, less risk of over-soaking
- Easy removal - When it's time to change, it strips cleanly
- Breathable - Less risk of trapping moisture behind the paper
The extra cost (usually 15-25% more than paper-backed) pays for itself in longevity and fewer callbacks.
Part 2: Choosing the Right Pattern (Without Regrets)
This is where most people go wrong. They fall in love with a pattern in a showroom or on Pinterest, order it, install it, and then realise it's completely wrong for their space.
Scale Matters More Than You Think
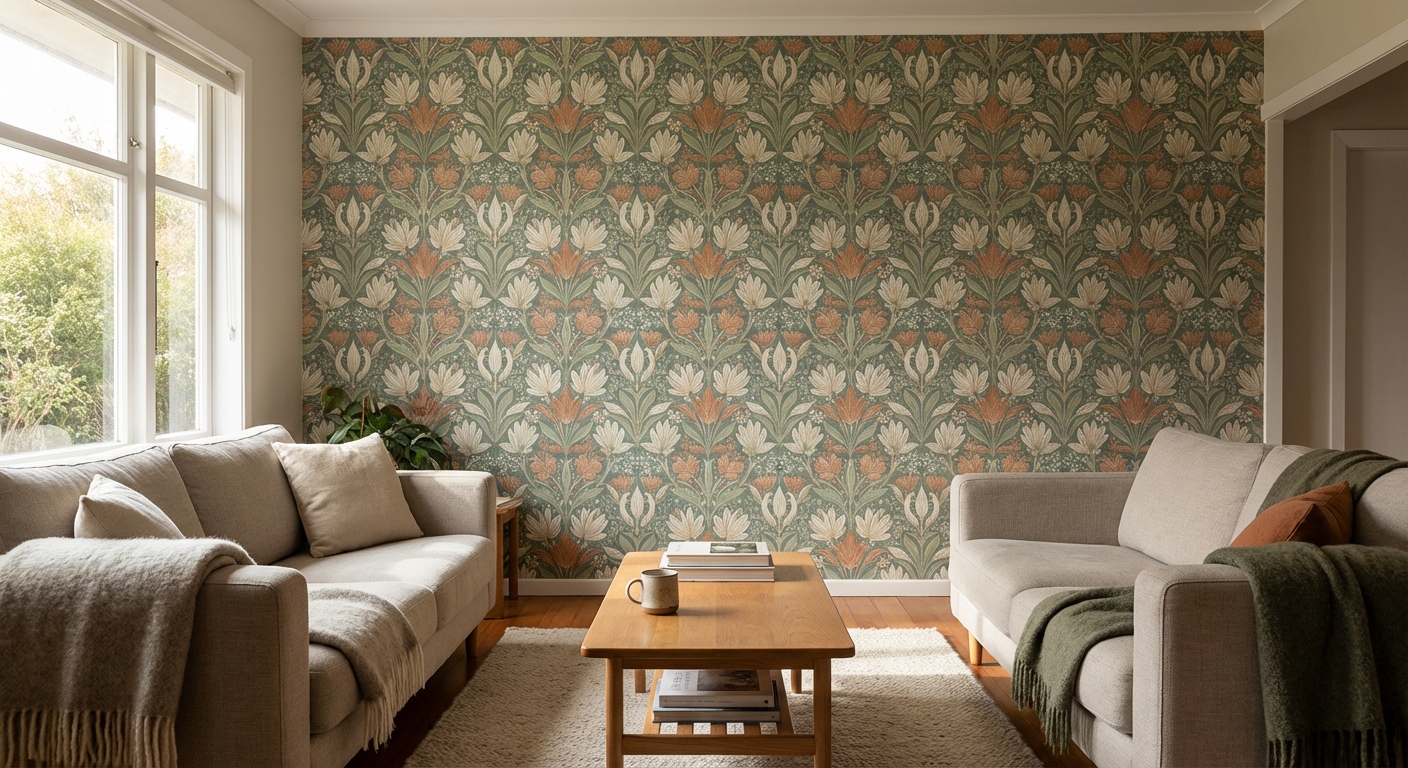
Large patterns (motifs bigger than 30cm):
- Make small rooms feel cramped
- Need large, uninterrupted walls to work
- Can be overwhelming if used on all walls
- Work best as feature walls in spacious rooms
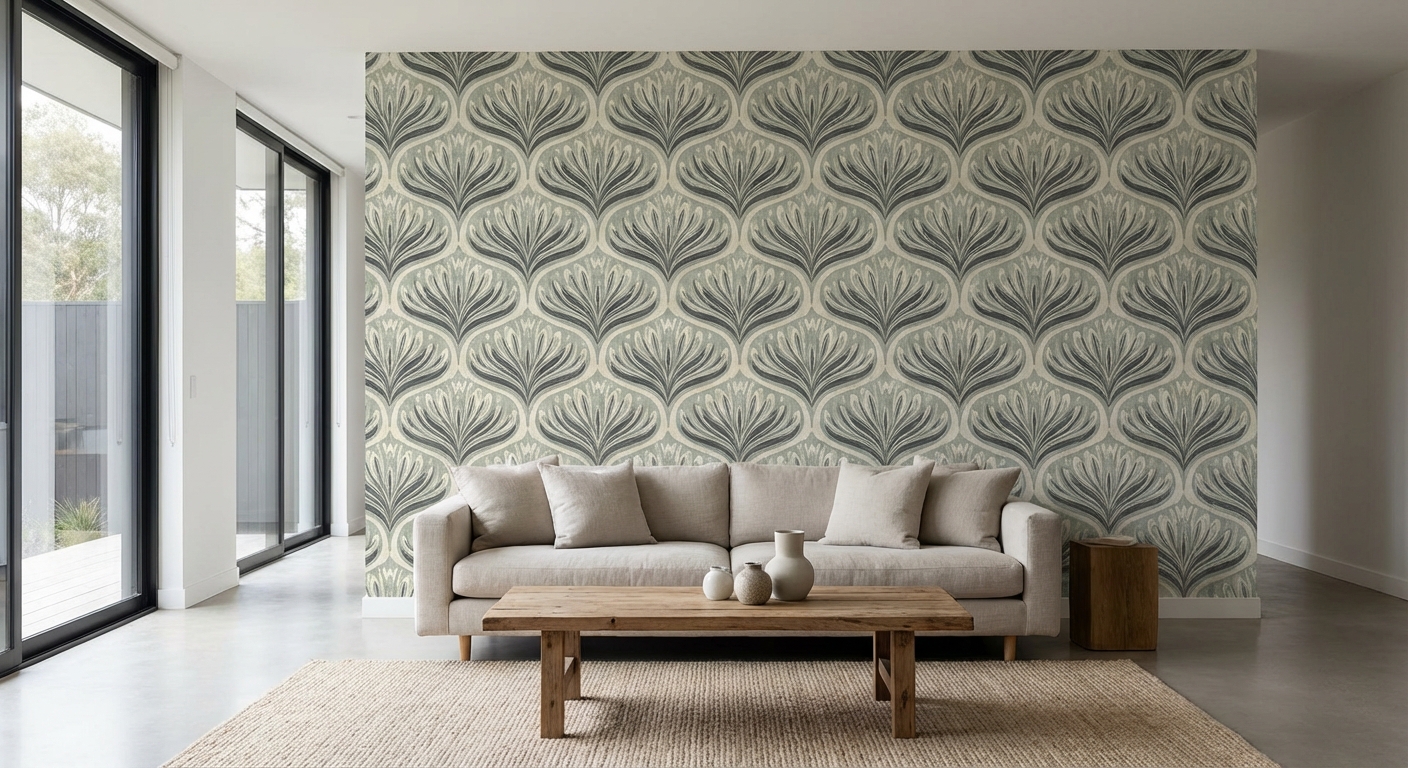
Medium patterns (motifs 10-30cm):
- Most versatile
- Work in most room sizes
- Still create visual interest
- Good balance of drama and livability
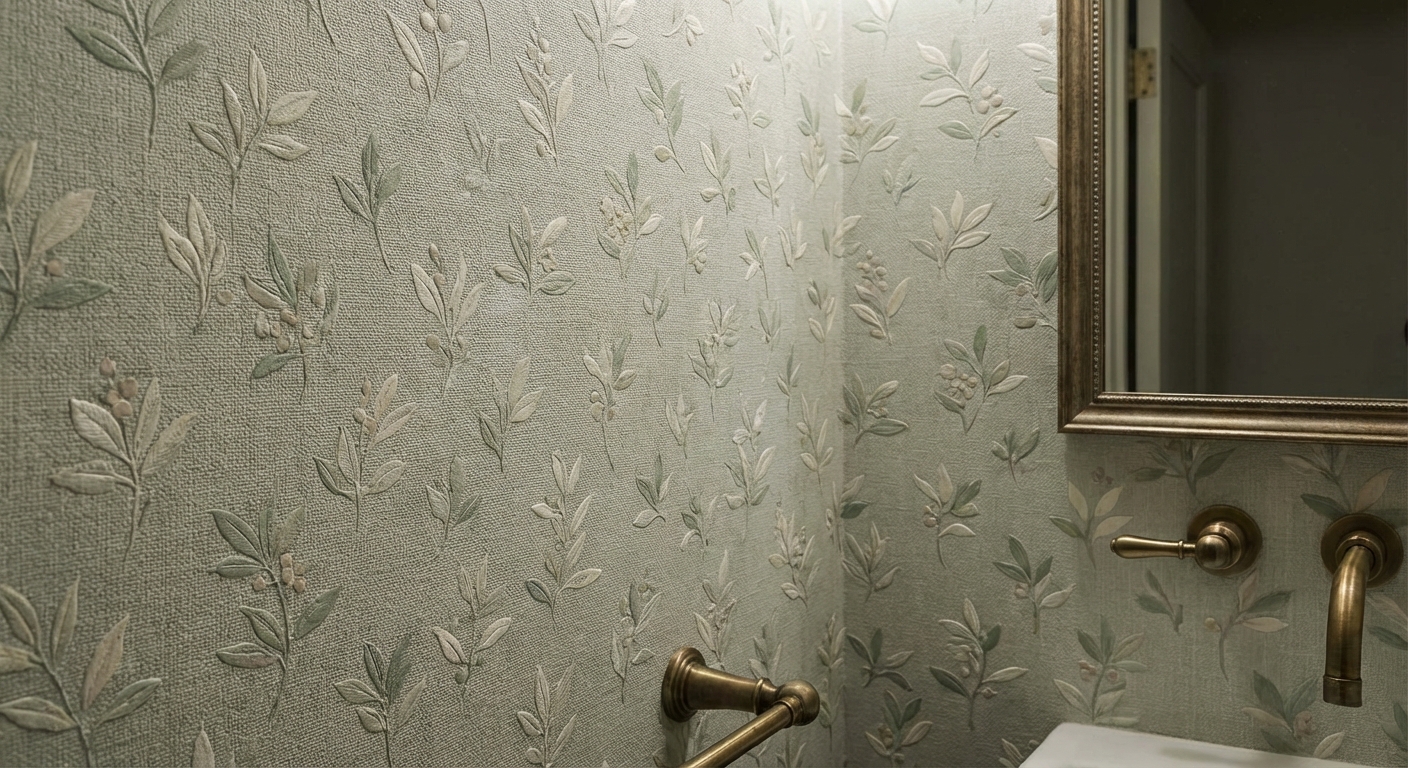
Small patterns (motifs under 10cm):
- Can look like visual noise from a distance
- Work well in small spaces like powder rooms
- Create a subtle texture effect
- Less dramatic but very livable
The Light Factor
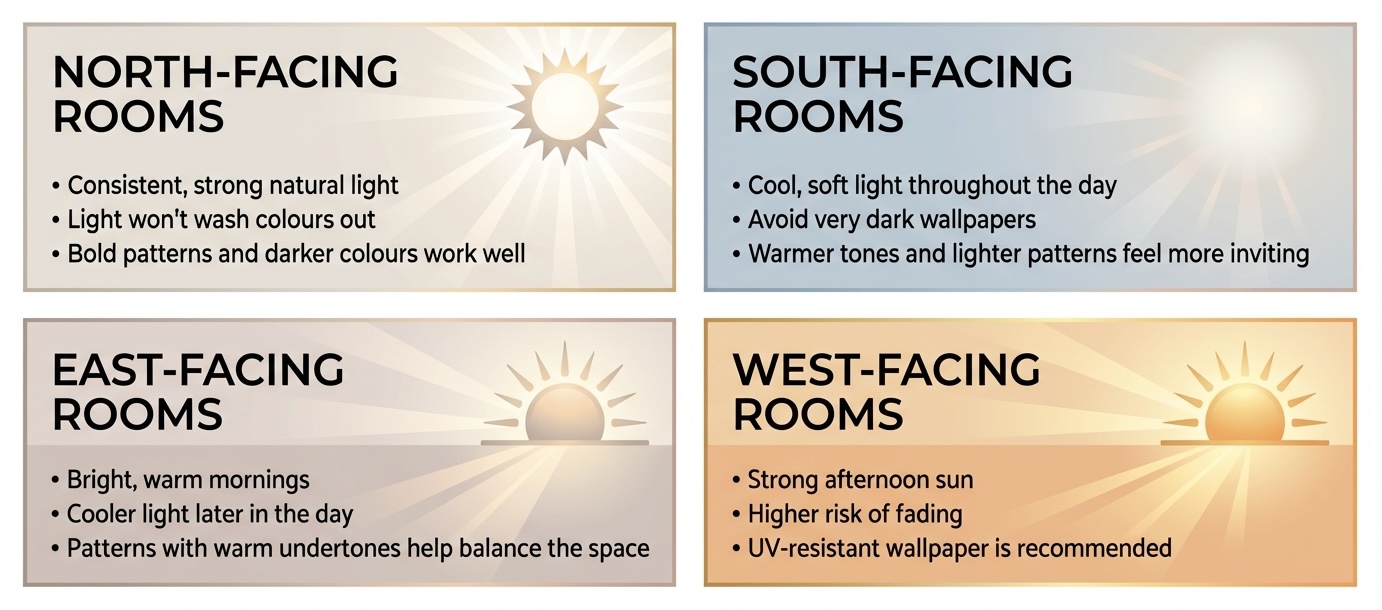
Our Kiwi light is different from the Northern Hemisphere light that most wallpaper is designed for. It's more intense, more blue, and changes dramatically through the day.
North-facing rooms: Get consistent strong light. Bold patterns and darker colours work well here because the light won't wash them out.
South-facing rooms: Cool, soft light all day. Avoid anything too dark or it'll feel like a cave. Warmer tones and lighter patterns work best.
East-facing rooms: Bright mornings, cool afternoons. Patterns with warm undertones help balance the cooler afternoon light.
West-facing rooms: Strong afternoon sun. Be careful with anything that might fade. UV-resistant papers are worth the investment here.
Read more about how light affects homes in New Zealand
Pattern Matching: The Hidden Cost
Here's something suppliers don't tell you: pattern matching affects how much wallpaper you need to buy.
Straight match: Pattern repeats horizontally across strips. Most efficient, typically 10-15% wastage.
Drop match (half-drop): Pattern repeats diagonally. Each strip starts at a different point. Usually 20-30% wastage.
Random/Free match: No pattern to match (textures, plains). Most efficient, under 10% wastage.
That $200/roll designer wallpaper with a 60cm drop match repeat? You'll need 25-30% more rolls than your wall area suggests. On a 10-roll job, that's an extra $500-600.
The Sample Test (Non-Negotiable)
Never, ever order wallpaper without seeing a physical sample in your actual room.
Here's my sample testing process:
- Get the largest sample possible (A4 minimum, ideally A3)
- Tape it to the wall you're planning to cover
- Look at it in morning light, afternoon light, and evening light
- Look at it with your regular room lighting on
- Live with it for at least a week
- Look at it from where you'll actually sit/stand in the room
That pattern that looked incredible on the website? It might look completely different under your LED downlights. The colour that seemed perfect in the showroom? Could clash horribly with your curtains.
Samples cost $5-20. Ordering the wrong wallpaper costs hundreds.
Part 3: Wall Preparation (Where Most DIY Jobs Fail)
I'll say it plainly: preparation is 80% of a successful wallpaper job. Skip it, rush it, or do it badly, and your beautiful wallpaper will fail.
Assessing Your Walls
Before you buy a single roll, you need to know what you're working with.
Check for:
Moisture - Hold a piece of plastic wrap against the wall, tape all edges, leave for 24 hours. If there's condensation underneath, you have a moisture problem that needs solving before wallpapering.
Texture - Run your hand over the wall. Any texture, bumps, or ridges will show through wallpaper. Orange peel, knockdown, or any decorative texture needs smoothing.
Damage - Holes, cracks, dents, nail pops. All need filling and sanding.
Previous wallpaper - Is there old wallpaper hiding under that paint? Tap the wall - hollow sounds suggest paper underneath. This needs removing, not covering.
Paint condition - Is the paint firmly adhered? Do the scratch test - drag a coin across an inconspicuous area. If paint flakes off, you've got adhesion issues.
The Preparation Steps (In Order)
Step 1: Repair
Fill all holes and cracks with a quality filler. For larger holes, use mesh tape and setting compound. Sand smooth when dry (120-grit, then 180-grit).
Brad's tip: In Central Otago's dry climate, filler dries faster than the packet says. Don't rush the second coat though - let each layer cure properly or it'll crack later.
Step 2: Clean
Wash walls with sugar soap solution. This removes grease, dust, and anything that'll prevent adhesion. Rinse with clean water and let dry completely.
Pay special attention to:
- Kitchen walls (cooking grease film)
- Bathroom walls (soap residue)
- Areas near fireplaces (soot)
- Anywhere kids have touched (sticky fingers)
Step 3: Sand
Even if walls look smooth, a light sand with 180-grit paper creates "tooth" for the paste to grip. Wipe down with a damp cloth after sanding to remove all dust.
Step 4: Seal (The Step Most People Skip)
This is crucial in NZ homes. Our timber-framed houses with GIB walls are porous. Without a sealer, your walls will suck the moisture out of the paste before it can bond properly.
Apply a dedicated wallpaper primer/sealer (not just any primer). This:
- Seals the porous surface
- Prevents the wall absorbing paste too quickly
- Makes future removal easier
- Provides a consistent surface for adhesion
Let it dry for 24 hours minimum before wallpapering.
Step 5: Size (For Painted Surfaces)
If you're wallpapering over previously painted walls, apply a coat of wallpaper size (diluted paste). This improves slip during hanging and adhesion after drying.
Special Cases
New GIB Board: Must be sealed. Fresh GIB is incredibly absorbent. Without sealer, your paste will disappear into the wall like water into sand.
Previously Wallpapered Walls: Remove all old wallpaper. Yes, all of it. I don't care if it's firmly stuck. If you paper over old wallpaper:
- The moisture from new paste can release the old adhesive
- Different expansion rates cause bubbling
- You're building a house of cards
Old wallpaper removal deserves its own section...
Removing Old Wallpaper (The Right Way)
What you'll need:
- Wallpaper scorer (Zinsser PaperTiger or similar)
- Wallpaper stripper solution or fabric softener (yes, really)
- Spray bottle or pump sprayer
- Wide scraper (100mm minimum)
- Steam stripper (for stubborn cases)
- Drop sheets
- Patience. Lots of patience.
The process:
-
Score the surface - The scorer creates tiny holes that let moisture penetrate. Don't press too hard or you'll damage the wall behind.
-
Apply stripper solution - Mix according to directions (or 1:4 fabric softener to hot water). Apply liberally with a sprayer. Let it soak for 15-20 minutes.
-
Start scraping - Work from seams and edges. The paper should come off in sheets. If it's not releasing easily, apply more solution and wait longer.
-
Remove residual adhesive - The backing glue often remains. Re-wet and scrape until the wall is clean. Any adhesive left behind will cause lumps under new wallpaper.
-
Repair and prep - Old wallpaper removal usually reveals damage. Fill, sand, seal as per standard prep.
For painted-over wallpaper: This is significantly harder. The paint prevents stripper solution from penetrating.
For more on this specific nightmare, see my guide to dealing with painted-over wallpaper.
Part 4: Installation Techniques (The Professional Method)
Right, your walls are prepped, your wallpaper is acclimatised (leave it in the room for 48 hours before hanging), and you're ready to go.
Tools You'll Need
Essential:
- Wallpaper paste (correct type for your paper)
- Paste brush or roller
- Paperhanger's brush or smoother
- Sharp knife and spare blades
- Seam roller
- Plumb line or laser level
- Tape measure and pencil
- Step ladder
- Clean bucket and sponge
- Drop sheets
Nice to have:
- Pasting table (essential for paste-the-paper method)
- Wallpaper trough (for pre-pasted papers)
- Caulking gun and paintable caulk
- Edge roller
Choosing the Right Paste
Standard paste (cellulose): For lightweight papers. Cheap and easy but weak.
Heavy-duty paste: For vinyl and heavier papers. More adhesion but harder to adjust.
Ready-mixed paste: Convenient but expensive and often too thick.
My recommendation: Metylan or Henkel heavy-duty paste for most jobs. Mix it slightly thinner than the packet suggests for better workability, thicker for ceilings or heavy papers.
Where to Start
Never start in a corner. Corners are rarely plumb (straight up and down). If you start there, your pattern will run progressively more crooked.
Instead:
- Find your focal point (usually the wall you see when entering)
- Measure the width of your wallpaper
- Mark a line half a width either side of the focal point center
- Use a plumb line or laser to ensure your first strip is perfectly vertical
This means your seams will fall symmetrically around the focal point, and any pattern mismatch from going around the room will end up in the least visible corner.
The Hanging Process
For paste-the-wall (non-woven) papers:
- Apply paste directly to the wall using a roller. Cover an area slightly wider than one strip.
- Cut your first strip, allowing 50mm extra at top and bottom.
- Align the top edge, leaving the excess to trim later.
- Press onto the wall, working from center outward with a smoother.
- Remove all air bubbles by brushing from center to edges.
- Trim excess at ceiling and skirting using a sharp blade.
- Wipe any paste from the surface immediately with a damp sponge.
For paste-the-paper (traditional) papers:
- Cut all strips for the wall, marking the top of each.
- Lay strip face-down on pasting table.
- Apply paste from center outward, making sure edges are covered.
- Fold (don't crease) paste-to-paste, ends to middle.
- Let the paper "book" for the time specified (usually 5-10 minutes). This lets the paper expand before hanging.
- Unfold top portion, align, and smooth onto wall.
- Unfold bottom portion and smooth down.
The Seams (Where Amateur Work Shows)
Perfect seams are the difference between professional and DIY results.
The technique:
- Butt edges together - don't overlap
- Use a seam roller to press edges firmly (but don't over-roll - it creates shiny lines)
- Roll within 10-20 minutes of hanging, while paste is still workable
- Wipe excess paste from seams immediately
Common seam problems and fixes:
Gaps appearing as paper dries: You've over-soaked the paper. It expanded wet, shrank dry. With paste-the-paper types, reduce booking time. With paste-the-wall types, make sure paper has acclimatised to room temperature.
Seams lifting: Not enough paste on edges, or you waited too long to roll. Re-paste and re-roll. If it's dried, you'll need to carefully peel back and re-paste.
Seams bubbling: Paste too thick, or you've trapped air. Slit bubble with sharp blade, inject paste, smooth down.
Corners and Obstacles
Internal corners:
- Measure from last strip to corner at top, middle, and bottom
- Cut strip to widest measurement plus 15mm
- Hang, wrapping 15mm onto next wall
- Measure corner to where you want next strip to end
- Cut new strip, hang into corner overlapping the 15mm wrap
- For vinyl (won't stick to itself), use overlap adhesive
External corners:
- Wrap paper around corner by about 25mm
- Use corner guard or sand edge smooth
- Start next strip from corner, overlapping slightly
- For a clean finish, use a straight edge to cut through both layers and remove excess
Around windows and doors:
- Hang paper over opening
- Make diagonal relief cuts to corners of frame
- Press into recess
- Trim along frame edge
- Smooth flat areas
Power points and switches:
- Turn off power at the mains (non-negotiable)
- Hang paper over outlet
- Feel for outlet, make an X-cut from corner to corner
- Trim triangles leaving 5mm excess
- Loosen plate, tuck excess behind, reattach
- Turn power back on only when paste is completely dry
Part 5: Maintaining Your Wallpaper
You've done the hard work. Now keep it looking good.
Cleaning Different Types
Vinyl: Wipe with damp cloth and mild detergent. Rinse with clean water.
Non-woven (washable): Damp cloth only, no scrubbing. Blot stains, don't rub.
Paper/Grasscloth: Dust only with soft brush. Spot clean with specialist cleaner.
Dealing with Damage
Bubbles appearing after installation: Small bubbles often disappear as paste dries. Give it a week. If they persist, slit with sharp blade, inject paste, smooth flat.
Lifting seams: Apply seam repair adhesive under edge, press firmly, wipe excess. Hold in place with painter's tape while drying.
Tears: For clean tears, apply paste to wall and paper edges, press back into place. For missing pieces, you'll need to patch - cut a piece larger than the damage, position over damage matching pattern, cut through both layers, remove old piece, paste in patch.
When to Call a Professional
Some situations are genuinely better left to the experts:
- Ceilings (awkward, exhausting, unforgiving)
- Stairwells and high walls (safety and access issues)
- Full rooms with multiple obstacles (bathrooms, kitchens)
- Heritage or expensive papers (one mistake is too costly)
- Pattern matching on large-scale designs
- Commercial spaces with time pressures
The Investment: What Quality Wallpapering Actually Costs
Let's talk real numbers for the Queenstown Lakes region.
DIY Costs (Materials Only)
| Item | Cost Range |
|---|---|
| Wallpaper (per roll, 10m) | $40-$250+ |
| Wallpaper paste | $25-$50 |
| Primer/sealer | $60-$100 |
| Tools (if buying) | $80-$150 |
| Sundries (blades, sponges, etc.) | $30-$50 |
For a typical feature wall (8-10m²):
- Budget paper: $200-$350 total
- Mid-range paper: $350-$550 total
- Designer paper: $600-$1,200 total
Professional Installation Costs
| Service | Cost per m² |
|---|---|
| Standard installation (non-woven) | $45-$65 |
| Premium/difficult papers | $65-$95 |
| Ceiling installation | $75-$110 |
| Wallpaper removal | $35-$55 |
| Full wall prep (if needed) | $25-$40 |
For a typical feature wall (8-10m²) with professional installation:
- Installation only: $360-$650
- Including removal of old paper: $600-$1,000
- Including full prep: $800-$1,250
Yes, professional installation costs more. But here's what you're paying for:
- No wasted wallpaper from mistakes
- Seams that don't show
- Pattern matching that actually matches
- Corners that don't peel
- A finish that lasts 10+ years
- Your weekend back
Common Mistakes and How to Avoid Them
After 15 years, I've seen every mistake in the book. Here are the ones I see most often:
Mistake 1: Not Ordering Enough Paper
Always order 15-20% extra for waste. If you have a large pattern repeat, order 25-30% extra. Running short mid-job and finding your batch is out of stock is a nightmare I wouldn't wish on anyone.
Mistake 2: Skipping the Primer
"The walls look fine, I'll just paste straight on."
No. Just no. Unprimed walls drink paste like a sponge. Your wallpaper won't stick properly, and removal later will destroy your GIB.
Mistake 3: Wrong Paste Consistency
Too thick = lumps under paper, hard to smooth Too thin = paper slides, seams won't stay
Follow the packet mixing instructions. Then test on a small area. Adjust as needed.
Mistake 4: Not Accounting for Pattern Repeat
That beautiful large-scale botanical with a 64cm repeat? You'll be cutting off nearly half of every strip to match the pattern. Plan accordingly, both in quantity ordered and where seams will fall.
Mistake 5: Papering Over Problems
That crack in the wall, that damp patch, that flaking paint - they won't magically disappear under wallpaper. They'll telegraph through and cause bigger problems later. Fix everything first.
Mistake 6: Rushing the Job
Wallpapering has specific timing requirements. Booking time for traditional papers. Drying time between wall prep and hanging. Time for paste to become tacky before hanging.
Rush any of these and the job fails. Plan for twice as long as you think it'll take.
Mistake 7: Temperature and Humidity Extremes
Don't wallpaper when it's too cold (paste won't cure) or too hot (paste dries before paper adheres). Don't wallpaper in high humidity (paste stays wet forever) or extreme dry (paste skins over instantly).
Ideal conditions: 18-22°C, 40-60% humidity. In Central Otago, this often means waiting for the right day.
Final Thoughts: Is Wallpaper Worth It?
After 15 years in this trade, here's what I tell clients:
Wallpaper transforms a space in a way that paint simply can't. The texture, depth, pattern, and personality it brings are unmatched. A well-chosen, well-installed wallpaper can be the making of a room.
But - and this is important - quality matters more than quantity.
One beautifully executed feature wall has more impact than an entire room done badly.
If budget is tight, spend it on quality paper for your most visible wall, installed properly. Don't spread cheap paper across every surface.
If you're not confident in your DIY skills, invest in professional installation. The difference in result is obvious, and you'll enjoy it every day for years.
And if you're in the Queenstown Lakes area and want wallpaper that will actually last through our wild climate swings? Well, you know where to find me.
Want to discuss a wallpaper project? Lakeside Wallpapering offers free consultations across Wanaka, Queenstown, Arrowtown, and Central Otago. We'll bring samples to your home, help you choose the right paper for your space, and give you an honest quote - no pressure, just straight advice from someone who's done this hundreds of times.
The author also runs lakeside painting, a professional painting company serving the Central Otago region - because sometimes the best backdrop for a feature wall is a perfectly painted room.
Quick Reference: Brad's Wallpaper Cheat Sheet
Best paper for NZ climate: Non-woven (fleece-backed)
Minimum prep steps: Clean → Repair → Sand → Seal → Size
Order quantity: Wall area ÷ roll coverage × 1.2 (or 1.3 for large repeats)
Paste mixing: Follow packet, err on slightly thinner side
Working time: 15-20 minutes per strip before paste skins
Seam rolling: Within 10-20 minutes of hanging
Drying time: 24-48 hours before touching or cleaning
Room conditions: 18-22°C, 40-60% humidity
Don't skip: Primer/sealer on the wall
Don't rush: Booking time for paper (if required)
When to hire a pro: Ceilings, stairwells, expensive papers, full rooms, heritage properties

About the Author
Bradley Hamilton
Bradley Hamilton brings over 14 years of experience in painting and wallpapering to homes across Queenstown and Central Otago.
Comments
Join the conversation by signing in
No comments yet.
Be the first to share your thoughts!