Bradley Hamilton
Lakeside Painting
G'day, it's Brad here.
Look, I'm going to be straight with you. In my 14 years painting homes around Queenstown, Wanaka, and Central Otago, I've watched sellers make two massive mistakes when it comes to painting before they list:
Mistake #1: They do nothing. List the place with scuffed walls, a faded front door, and peeling weatherboards. Then wonder why buyers are lowballing them by $30K.
Mistake #2: They go overboard. Hire painters to repaint the entire house, including rooms that were already fine. Drop $15K on paint work when $2K in strategic DIY would've done the job.
Last month, I had two clients selling in Arrowtown. Same street, similar houses, both built in the early 2000s.
House A: Owners spent $12K getting pros to paint every single room. Looked mint. Sold for $920K.
House B: Owners called me for advice. We identified the 5 areas that actually mattered to buyers. They spent $2,100 on materials, put in three weekends of work, and I helped with the tricky bits. Sold for $935K.
Yeah, you read that right. The DIY job sold for MORE.
Here's the thing: buyers aren't valuing "fresh paint everywhere." They're valuing "this place is move-in ready and well-maintained." Smart, targeted paint work hits that brief without breaking the bank.
So let me share exactly which painting projects deliver the best ROI for Kiwi homeowners preparing to sell, what they actually cost, and how to plan the work before your listing date.
The ROI Reality: What Painting Actually Returns in NZ
Before we dive into specific projects, let's talk numbers.
According to recent property data from across New Zealand and my own conversations with real estate agents in our region:
- Interior painting: Returns $2-$4 for every $1 spent (200-400% ROI)
- Front door + trim: Returns $2-$5 for every $1 spent (200-500% ROI)
- Exterior weatherboard refresh: Returns $3-$6 for every $1 spent (300-600% ROI)
- Kitchen cabinet painting: Returns $2-$3 for every $1 spent (200-300% ROI)
Now, here's what the real estate agents I work with in Queenstown and Wanaka actually say:
"A freshly painted home photographs better, shows better, and gives buyers confidence that the property has been maintained. We typically see well-painted homes sell 2-3 weeks faster and for 2-5% more than comparable homes that need paint work."
On an $800K Queenstown home, that's $16K-$40K in added value. For a $2K-$5K paint investment.
The maths is pretty bloody compelling.
Top 5 Pre-Sale Painting Projects (Ranked by ROI)
Alright, here are the five painting projects that'll give you the biggest bang for your buck when you're preparing to sell. I've ranked them by ROI, but honestly, you'll probably want to tackle most of these.
1. Front Door + Exterior Trim (ROI: 200-500%)
Why it's #1: Your front door is the first thing buyers see. A tired, peeling, sun-faded door screams "deferred maintenance." A freshly painted door in a quality color says "this place has been looked after."
I've literally watched buyers pull up to a listing, see the front door, and decide not to even get out of the car. First impressions are EVERYTHING.
The Cost (DIY):
- Quality exterior paint/stain: $80-120
- Primer: $50
- Sandpaper, filler, brushes: $40
- Total: $170-210
The Time: One weekend (Saturday prep, Sunday paint)
Brad's Pro Tips:
- Sand that door properly. Start with 120-grit, finish with 180-grit. If you skip this, your top coat will look dodgy.
- Use exterior-grade paint. Don't try to save $30 by using interior paint outside. It'll fail within a year and make you look like a cowboy.
- For Queenstown/Wanaka weather: look for paints rated for "extreme weather" or "alpine conditions." Our UV is brutal.
- Color matters: Deep blues, classic blacks, and charcoal greys test well with buyers. Avoid loud reds, purples, or yellow (unless your house is a cute cottage where it actually works).
- Don't forget your letterbox, gate, and garage door trim. These all contribute to curb appeal.
When to DIY vs Hire:
- DIY if: Your door is wood or previously painted metal, no major damage
- Hire a pro if: You've got intricate heritage details, damaged panels needing repair, or a weatherboard exterior that also needs work
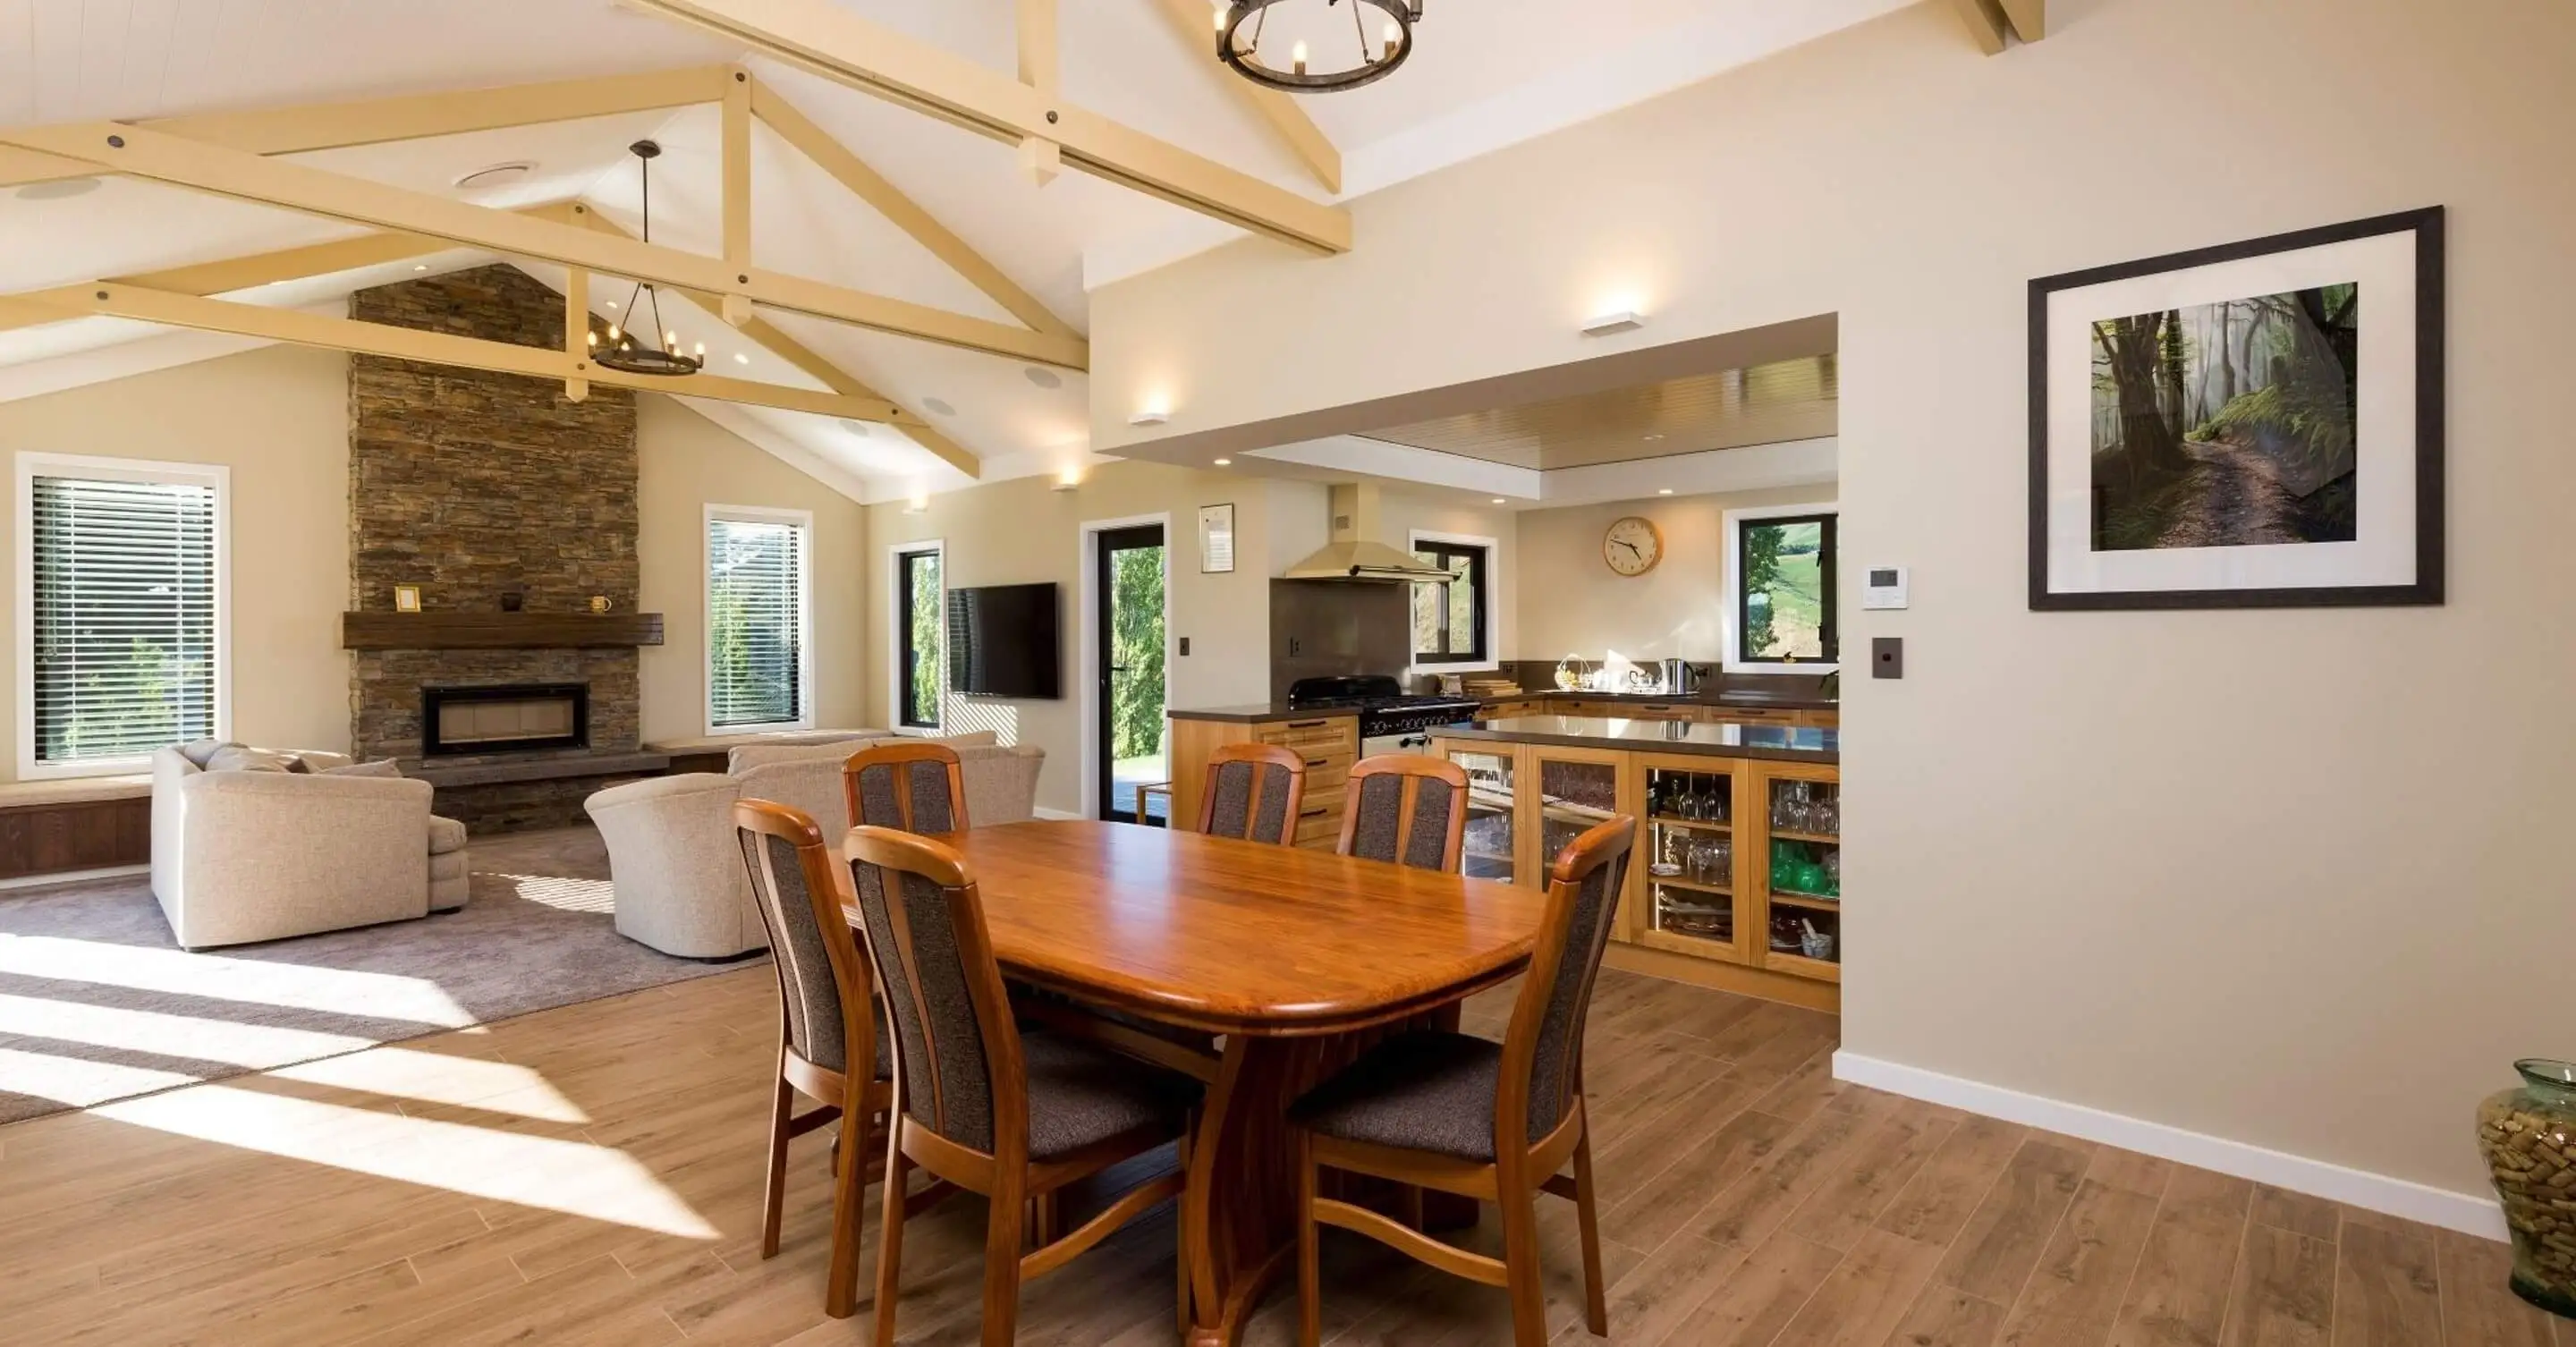
2. Living Areas + Kitchen Walls in Neutral Tones (ROI: 200-400%)
Why it works: Buyers need to envision their furniture, their life, in your space. That feature wall you painted "Resene Dynamite" (yes, that's a real color, and yes, it's as full-on as it sounds)? It's killing their imagination.
Neutral doesn't mean boring. It means sophisticated, timeless colors that let buyers focus on the space itself, not your design choices.
The Cost (DIY): For a typical open-plan living/kitchen area (50-70m²):
- Paint (2-3 coats): $300-450
- Primer (if covering dark colors): $150-200
- Rollers, trays, drop sheets, tape, filler: $80
- Total: $530-730
The Time: Two weekends (one for prep, one for painting)
Brad's Pro Tips:
- Go with "Half" colors in the Resene range: Half Rice Cake, Half Sea Fog, Half Merino. These are sophisticated neutrals that work with NZ light.
- If you've currently got dark or bold colors, you MUST prime first. I see DIYers try to cover Resene "Navy" with two coats of white. Mate, it'll take four coats and still look patchy. Just prime it.
- Use low-sheen or flat for walls, semi-gloss for trims. This is non-negotiable for a professional look. Read my full guide on sheen selection here.
- Don't forget the ceiling if it's yellowed or stained. A fresh white ceiling makes the whole room feel taller and cleaner.
Rooms to prioritize:
- Living room (buyers spend the most time here during viewings)
- Kitchen (if painting cabinets isn't in the budget, at least do the walls)
- Dining area (if it's visible from the living room)
Skip: Bedrooms 2-4 if they're already neutral and in decent shape. Focus your energy where buyers spend the most time.
3. Master Bedroom + Ensuite (ROI: 150-300%)
Why it matters: The master is where buyers imagine their sanctuary. A fresh, calming master suite signals "this home is a retreat," not just a place to crash.
Plus, ensuites take a beating. Moisture, mildew, grubby marks around light switches. Freshening up the ensuite paint is a small investment that pays off huge.
The Cost (DIY): For a typical master bedroom (15-20m²) + ensuite (5-8m²):
- Paint: $200-280
- Mould-resistant bathroom primer: $50
- Supplies: $60
- Total: $310-390
The Time: One long weekend
Brad's Pro Tips for Bedrooms:
- Warmer neutrals work well in bedrooms: Resene Quarter Biscotti, Resene Eighth Fossil, Resene Half Spanish White
- If there's carpet, use drop sheets religiously. Paint splatter on carpet is a nightmare to remove and will cost you more to replace than you spent on the paint job.
Brad's Pro Tips for Ensuites:
- Use bathroom-specific paint with mould inhibitors. Resene SpaceCote is my go-to. Yes, it costs more. No, you shouldn't skip it.
- Semi-gloss or gloss sheen for bathrooms. Makes cleaning easier and moisture doesn't penetrate as easily.
- If there's mould on the walls currently, clean it with a bleach solution (1:4 ratio with water) before you prime. Painting over mould is like putting a bandaid on a broken leg.
- Check your extractor fan works. If it doesn't, the paint job won't matter. Buyers will see mould come back and assume the house has moisture problems.
4. Exterior Weatherboard/Cladding Touch-Ups (ROI: 300-600%)
Why it's huge: Exterior paint isn't just aesthetic. It's protection. Peeling weatherboards signal "expensive maintenance ahead" to buyers. That'll knock tens of thousands off your sale price, or kill the sale entirely.
You don't need to repaint the entire exterior (unless it's truly rooted). Strategic touch-ups on the visible areas can be enough to make buyers comfortable.
The Cost (DIY): For touch-ups on a typical 150m² home (front facade + obvious areas):
- Exterior paint: $200-350
- Primer: $80
- Scrapers, sandpaper, filler: $60
- Total: $340-490
The Time: Two weekends (weather dependent)
Brad's Pro Tips:
- Scrape and sand any peeling areas back to solid paint. If you paint over loose paint, it'll fail immediately and look worse than when you started.
- Spot prime any bare wood. Weatherboards soak up paint differently where they're bare vs where there's old paint. Priming evens this out.
- Match your existing color if it's still in good shape. Most paint stores can color-match from a chip. Don't try to guess.
- Timing: Paint exterior in spring or autumn in our region. Summer temps can cause paint to dry too fast (leading to poor adhesion), and winter is too cold for proper curing.
- If you've got a south-facing wall in Queenstown/Wanaka, it probably gets hammered by weather. This is where buyers will look for maintenance issues. Prioritize this side.
When to DIY vs Hire:
- DIY if: It's touch-up work (less than 30% of the home's exterior)
- Hire a pro if: More than 30% needs work, you've got two-storey areas requiring scaffolding, or there's rot that needs repair first
For a full guide on repainting weatherboards, check out my deep dive here.
5. Kitchen Cabinets (If Condition Allows) (ROI: 200-300%)
Why it's on the list: Kitchens sell houses. Full stop. A dated, worn kitchen can tank your sale price by $20K-30K. But a full kitchen reno costs $40K+.
Painting cabinets is the middle ground. For $500-800 in materials and 3-4 weekends of work, you can transform 1990s honey oak cabinets into modern, neutral-toned units that buyers actually want.
But here's the catch: Not all cabinets are paintable, and not all DIYers can pull this off. This is where a lot of DIY jobs go sideways.
The Cost (DIY): For a typical kitchen (15-20 cabinet doors + frames):
- Cabinet-specific primer: $120
- Cabinet-specific paint: $150-200
- Sandpaper (various grits): $40
- TSP cleaner: $15
- Brushes, rollers, trays: $60
- New hardware (optional but recommended): $100-200
- Total: $485-635 (or $685-835 with hardware)
The Time: 3-4 weekends (this is NOT a quick project)
Brad's Honest Assessment: I've seen absolutely mint DIY cabinet jobs that added huge value. I've also seen absolute disasters that dropped home value by $10K because the finish was so bad.
Here's my rule: Only DIY kitchen cabinets if:
- Your cabinets are solid wood or MDF (not laminate or thermofoil—these don't paint well)
- They're structurally sound (no water damage, no delaminating)
- You're willing to do proper prep (sand, clean, prime, sand again)
- You're patient and detail-oriented
- You've got good ventilation or can take doors outside to paint
If any of these are a "no," hire a pro or skip this project entirely. A bad cabinet paint job is worse than leaving them original.
Brad's Pro Tips (if you're doing this):
- Remove doors and hardware. Paint them flat, not installed. You'll get a way better finish.
- TSP (trisodium phosphate) clean everything first. Kitchens are covered in grease. Paint won't stick to grease.
- Use a foam roller for doors (smoothest finish) and a quality brush for frames.
- Two coats of primer, two coats of paint, MINIMUM. Light sand (220-grit) between each coat.
- Consider a paint sprayer if you want a pro-level finish. But test it first—overspray can ruin your benchtops, walls, and floors.
Want the full breakdown on this project? I'm planning a dedicated cabinet painting guide for 2025.
The Real Cost Breakdown: DIY Investment Summary
Let's add it all up. If you tackle all five projects as DIY:
| Project | Materials Cost | Time Investment | Est. Value Added |
|---|---|---|---|
| Front door + trim | $170-210 | 1 weekend | $1,000-2,000 |
| Living areas + kitchen walls | $530-730 | 2 weekends | $3,000-6,000 |
| Master + ensuite | $310-390 | 1 weekend | $1,500-3,000 |
| Exterior touch-ups | $340-490 | 2 weekends | $2,000-5,000 |
| Kitchen cabinets (optional) | $485-635 | 3-4 weekends | $4,000-8,000 |
| TOTAL (without cabinets) | $1,350-1,820 | 6 weekends | $7,500-16,000 |
| TOTAL (with cabinets) | $1,835-2,455 | 9-10 weekends | $11,500-24,000 |
Average ROI
468-976%
Return on investment
Investment Range
$1.4K-$2.5K
Total DIY materials cost
Note: These costs assume you already own basic tools like drop sheets, a ladder, and brushes. Add $150-200 if starting from scratch. All prices in NZD (2024-2025).
Show me another home improvement project with returns like that. I'll wait.
Brad's Pre-Sale Painting Timeline: The 8-Week Plan
Alright, so you've decided to list your house. When should you actually do this paint work?
Here's the timeline I give clients who are preparing to sell in Queenstown, Wanaka, or anywhere in NZ:
Week 1-2 (8-7 weeks before listing):
- Get your home assessed by a real estate agent (they'll tell you what buyers in your area care about)
- Walk through your own place like a buyer. Note every scuff, mark, and tired surface.
- Decide which projects to DIY vs hire out
- Order paint samples and test them in different light (this matters way more than you think)
Week 3-4 (6-5 weeks before listing):
- Order all your materials (don't piecemeal this—you'll waste time on multiple trips)
- Clear the first area you're painting (move furniture, take down art)
- Start with exterior work if weather is good (this takes longest to dry and you need good conditions)
Week 5-6 (4-3 weeks before listing):
- Tackle interior walls (living areas, master bedroom)
- This is also when you should be doing any other pre-sale work (cleaning, repairs, decluttering)
Week 7 (2 weeks before listing):
- Touch-ups and final details
- Ensuite and smaller projects
- Let everything cure
Week 8 (1 week before listing):
- Professional photos get taken
- Any last-minute touch-ups from the photo shoot
Why this timeline?
Paint needs time to cure and off-gas. If your photographer shows up and your living room smells like a paint factory, that's a problem. Plus, you need buffer time. DIY projects always take longer than you think, and our weather in Central Otago can throw spanners in the works.
If you're listing in winter, add 2-3 weeks to this timeline. Cold weather slows drying times significantly.
What Real Estate Agents Actually Notice (And Tell Buyers)
I've worked with dozens of real estate agents over the years. Here's what they've told me they look for when they walk through a listing:
Green Flags (things that make them excited to sell your place):
- Neutral, modern colors throughout
- Fresh paint smell (but not overpowering—shows recent maintenance)
- Clean, sharp lines where walls meet trim (shows attention to detail)
- Consistent sheen levels (all walls in flat or low-sheen, all trim in semi-gloss)
- No scuffs around light switches, door frames, or high-traffic areas
Red Flags (things that make them suggest a price drop):
- Bold accent walls or trendy colors (limits buyer pool)
- Patchy coverage or visible roller marks (screams "dodgy DIY")
- Paint on windows, fixtures, or switch plates (shows carelessness)
- Peeling or bubbling paint (signals moisture problems or poor prep)
- Mismatched sheen levels (shows inexperience)
One agent in Queenstown told me: "I can tell within 30 seconds of walking into a home whether the owners took pride in maintaining it. Fresh, quality paint work is one of the biggest signals. It's not just about aesthetics—it tells buyers they won't be dealing with surprise maintenance issues after they move in."
That's what you're really selling: peace of mind.
The 3 DIY Painting Mistakes That KILL Home Value
Look, I love a good DIY success story. But I've also seen DIY disasters that have cost sellers tens of thousands. Here are the three biggest mistakes:
Mistake #1: Painting Over Problems Without Prep
I once valued a home in Arrowtown where the sellers had painted over water-stained ceilings. No primer, no stain blocker, just white paint. The stains bled through within weeks. The buyers noticed during the second viewing and assumed the house had ongoing roof leaks.
The sale fell through. The sellers had to hire pros to fix it properly, re-list, and accept an offer $25K lower than the original.
The lesson: If there's damage, staining, mould, or any underlying issue—FIX IT FIRST. Paint is a finish, not a solution.
Mistake #2: Using the Wrong Sheen or Quality of Paint
Flat paint in a kitchen. Gloss paint in a living room. Interior paint on exterior surfaces. Cheap $20-per-liter paint that looks streaky and thin.
I see these mistakes constantly, and they all scream "amateur hour" to buyers.
The lesson: Use the right tool for the job. Read my guide on sheen selection here if you're not sure what to use where.
Quality paint costs more, but it covers better (fewer coats = less time) and looks better (buyers notice). On a $2K paint job, skimping on paint quality to save $100 is bloody stupid.
Mistake #3: Bold, Trendy Colors in Main Living Areas
That Resene "Dragon Fruit" accent wall in your living room? It's killing your sale.
I don't care how much you love it. I don't care that it was Instagram-trendy in 2022. Buyers see bold colors and immediately calculate the cost and effort to repaint. That reduces your perceived value.
The lesson: If you're selling within 12 months, paint everything neutral NOW. Save the bold colors for your next place.
When to DIY vs When to Hire a Pro
Here's my honest framework for deciding what to DIY and what to outsource:
You Can DIY:
- Interior walls in good condition
- Front door and simple trim
- Small to medium exterior touch-ups
- Bathrooms (if you use proper paint and prep)
- Simple kitchen cabinets (if you meet my criteria from earlier)
You Should Hire:
- Entire exterior repaints (especially two-storey or scaffolding required)
- Ceilings (harder than they look, especially if they're textured)
- Large-scale cabinet painting (if you want a flawless finish)
- Any surface with significant damage requiring repair first
- Heritage or villa details requiring specialist knowledge
- Projects where you lack the time, tools, or patience to do it properly
The hiring decision comes down to this: Will a professional finish add more value than the cost of hiring?
For exterior work, the answer is usually yes. For interior walls, you can probably DIY and get 90% of the pro result if you follow proper techniques.
For a full cost breakdown on DIY vs professional painting, check out my guide here.
Bottom Line: Smart Pre-Sale Painting is an Investment, Not a Cost
Look, I get it. You're about to sell your house. You've got real estate fees, moving costs, maybe a new place to buy. Spending money on paint work feels like a burden.
But here's the reality: a $2,000 DIY paint investment can add $10,000-20,000 to your sale price. It can shorten your time on market by 2-3 weeks. And it can be the difference between buyers competing for your place vs trying to negotiate you down.
That's not a cost. That's an investment with a 500%+ return.
The key is being strategic:
- Focus on high-impact areas: Front door, living areas, master bedroom, exterior touch-ups
- Use quality materials: Don't cheap out on paint or prep supplies
- Plan your timeline: Give yourself 8 weeks before listing
- Hire pros for the tricky stuff: Don't DIY your way into a value-killing disaster
- Keep it neutral: Your design taste isn't the buyer's design taste
If you follow this approach, you'll maximize your sale price without overspending on paint work you don't need.
And if you're in the Queenstown, Wanaka, or Central Otago area and want specific advice for your place, check out my recommendations for local painters who can help or get in touch. I'm always happy to walk through a place and give honest advice on what's worth doing.
Now get out there and add some value to your home. You've got this.
Cheers, Brad
Want more pre-sale advice? Check out these related guides:
- 10 Smart Ways to Slash Your DIY Painting Costs
- How to Pick the Perfect Interior Paint Colors
- The Complete Guide to Repainting Weatherboards
- Finding Reliable Painting Contractors in Queenstown & Wanaka
The author also runs lakeside painting, a professional painting company serving the Central Otago region.

About the Author
Bradley Hamilton
Bradley Hamilton is a professional painter with over 14 years of experience transforming homes across Queenstown, Wanaka, and Central Otago. He's helped hundreds of homeowners prepare their properties for sale, combining his expertise in painting with real estate insights to maximize home values. Brad's no-nonsense approach cuts through industry myths to deliver honest, practical advice that actually works in New Zealand conditions.
Comments
Join the conversation by signing in
No comments yet.
Be the first to share your thoughts!