
Bradley Hamilton
Lakeside Painting
If you own a cedar home in Central Otago, sooner or later you'll be standing in your driveway looking at the cladding and thinking: does this need a touch-up, or is it bigger than that?
It's the question I get asked more than any other. And the honest answer is: it depends on what your cedar's actually doing — not on how long it's been since the last coat. Two homes built the same year, with the same product, can end up needing completely different treatments based on exposure, the original product, and how the timber's holding up.
This guide walks through three real cedar jobs we've finished recently — one was a simple oil refresh, two needed full restorations — and exactly how we knew which approach each one needed. By the end you should be able to look at your own cladding and have a much better idea of where you sit on the spectrum.
The two ends of the spectrum
Most cedar work falls into one of two buckets:
Maintenance oil refresh. Your cedar is still holding the previous stain reasonably well. The colour might be pulling out of the most exposed elevations, and the timber feels dry, but the boards aren't lifting, peeling, or going seriously grey. You wash it down, do a test patch to match the existing product, and apply one properly saturated coat of penetrating oil stain. Job done — usually in a few days.
Full restoration. The previous coating has failed. You're looking at peeling, cracking, blistering, or deeply weathered grey timber. You can't just put a new coat over the top — you have to strip back to bare wood (sometimes by sanding, sometimes with a chemical stripper), prep around the windows and trim, then build the colour back up with multiple coats.
The price difference between these two is significant — a refresh might be $2,500–4,500 incl. GST on a typical home, where a full restoration on the same property could easily be $8,000–15,000+. So getting the diagnosis right matters.
Here's what each one looks like in real life.
Case 1: Maintenance oil refresh, Northlake
This was a home in the Northlake subdivision in Wānaka — clad in vertical cedar, with a previous oil-based stain in light oak. Owner had been keeping an eye on it and called us before things got serious.
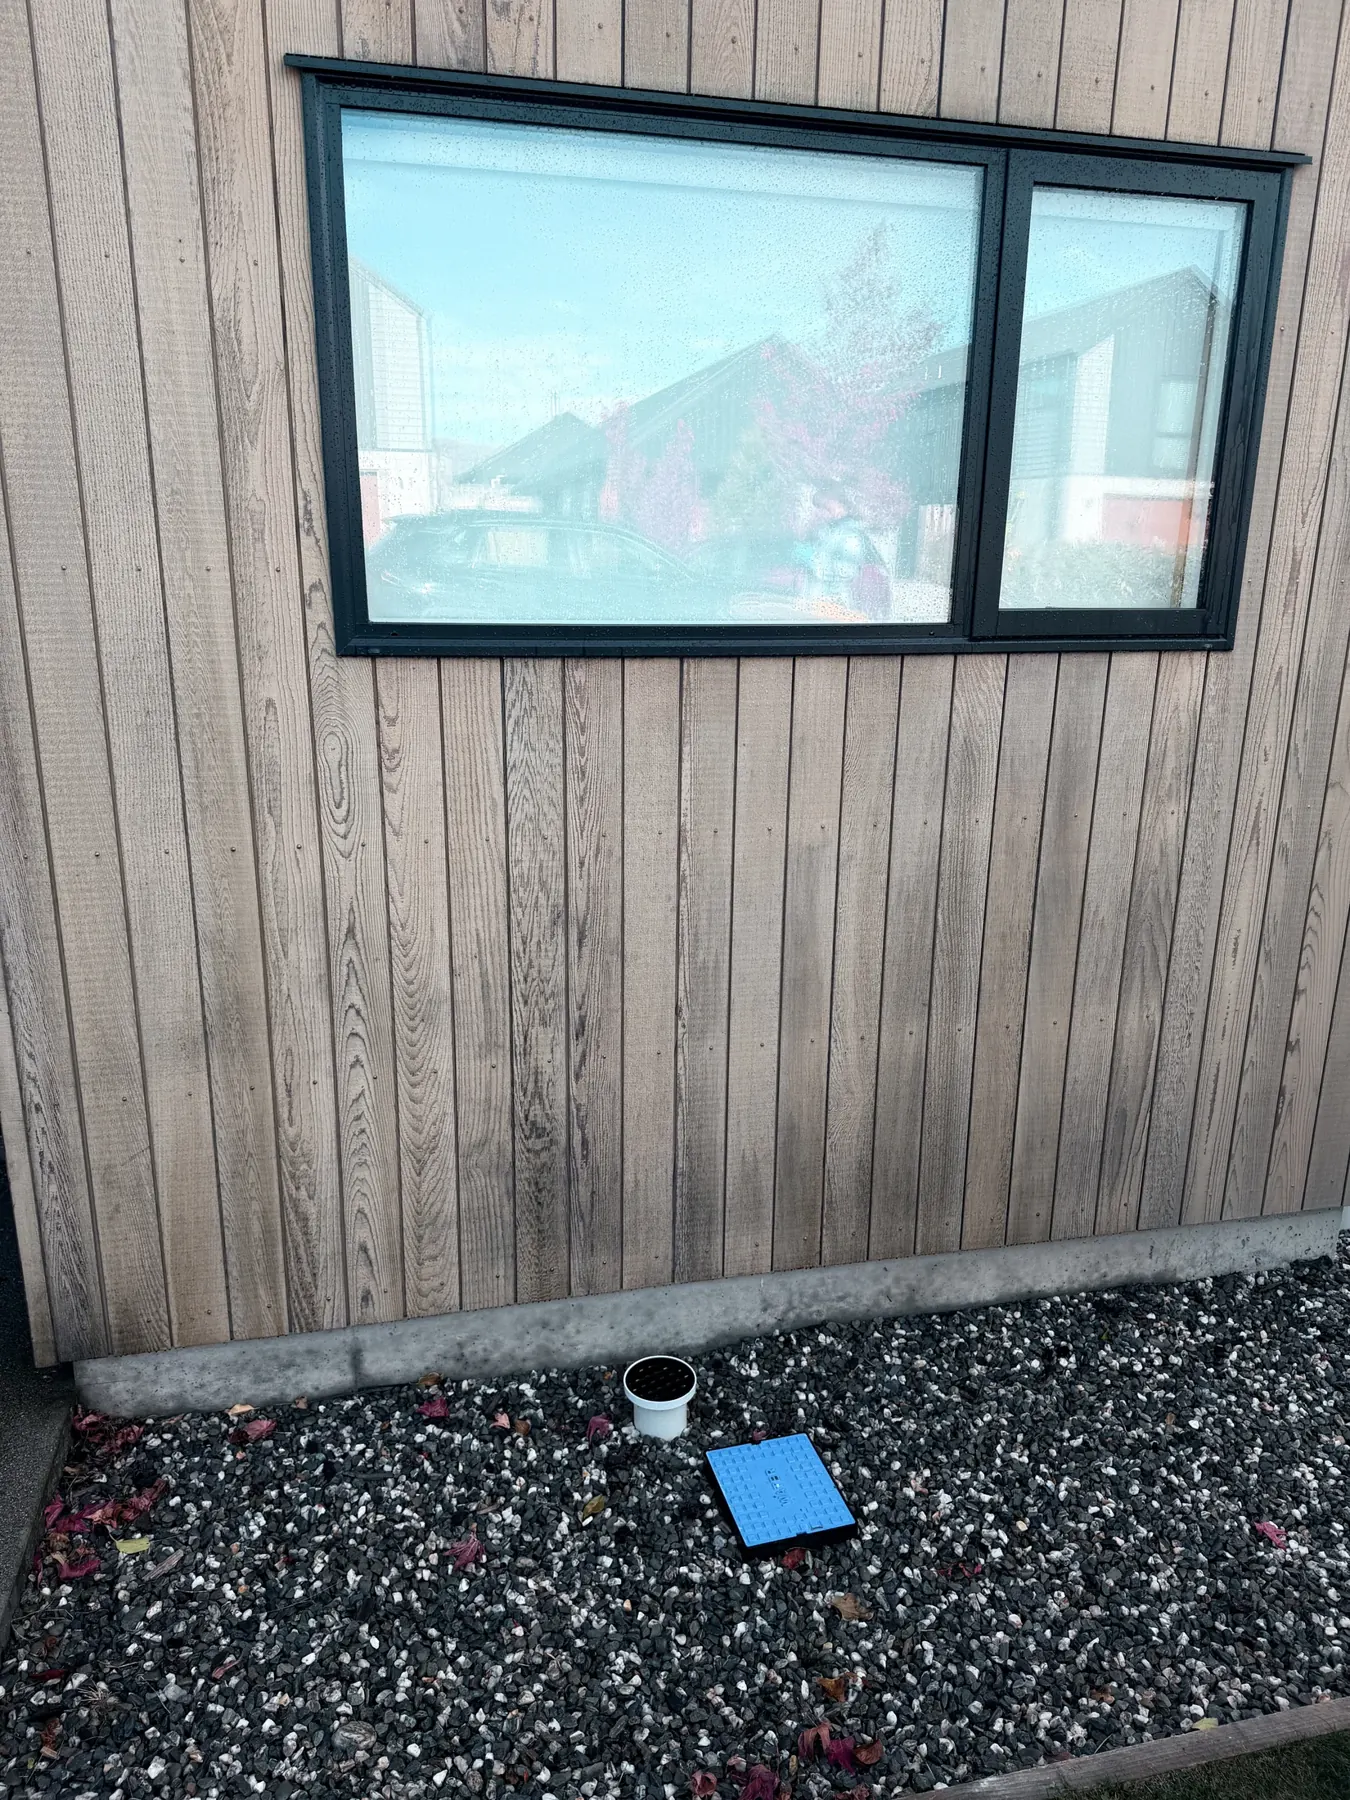
Look at that "before" shot carefully. Yes, the cedar's clearly tired — the colour has pulled out, especially on the upper boards that take the worst sun, and there's a dry, slightly chalky look to the surface. But crucially:
- The boards aren't lifting or peeling
- There's no cracking or blistering of the existing coating
- The timber underneath is sound — not silver-grey or fibrous
- There are no big patches where the stain has completely failed
That tells me the previous oil stain has done its job, just exhausted itself. The cedar is thirsty, not damaged. This is exactly the moment you want to catch it.
We did a thorough chemical wash to remove dust, oxidation and surface contaminants, then test-patched a few products to match the existing stain. Dryden WoodOil in Lite Oak proved to be a near-perfect match.
You can see in that close-up how dramatically the timber drinks the oil. That colour shift between the freshly-stained sections and the bare boards above is the timber telling you it was thirsty.
We applied one properly saturated coat using the manufacturer's recommended method, with extra attention given to the sun-exposed front gable and the more weathered boards.

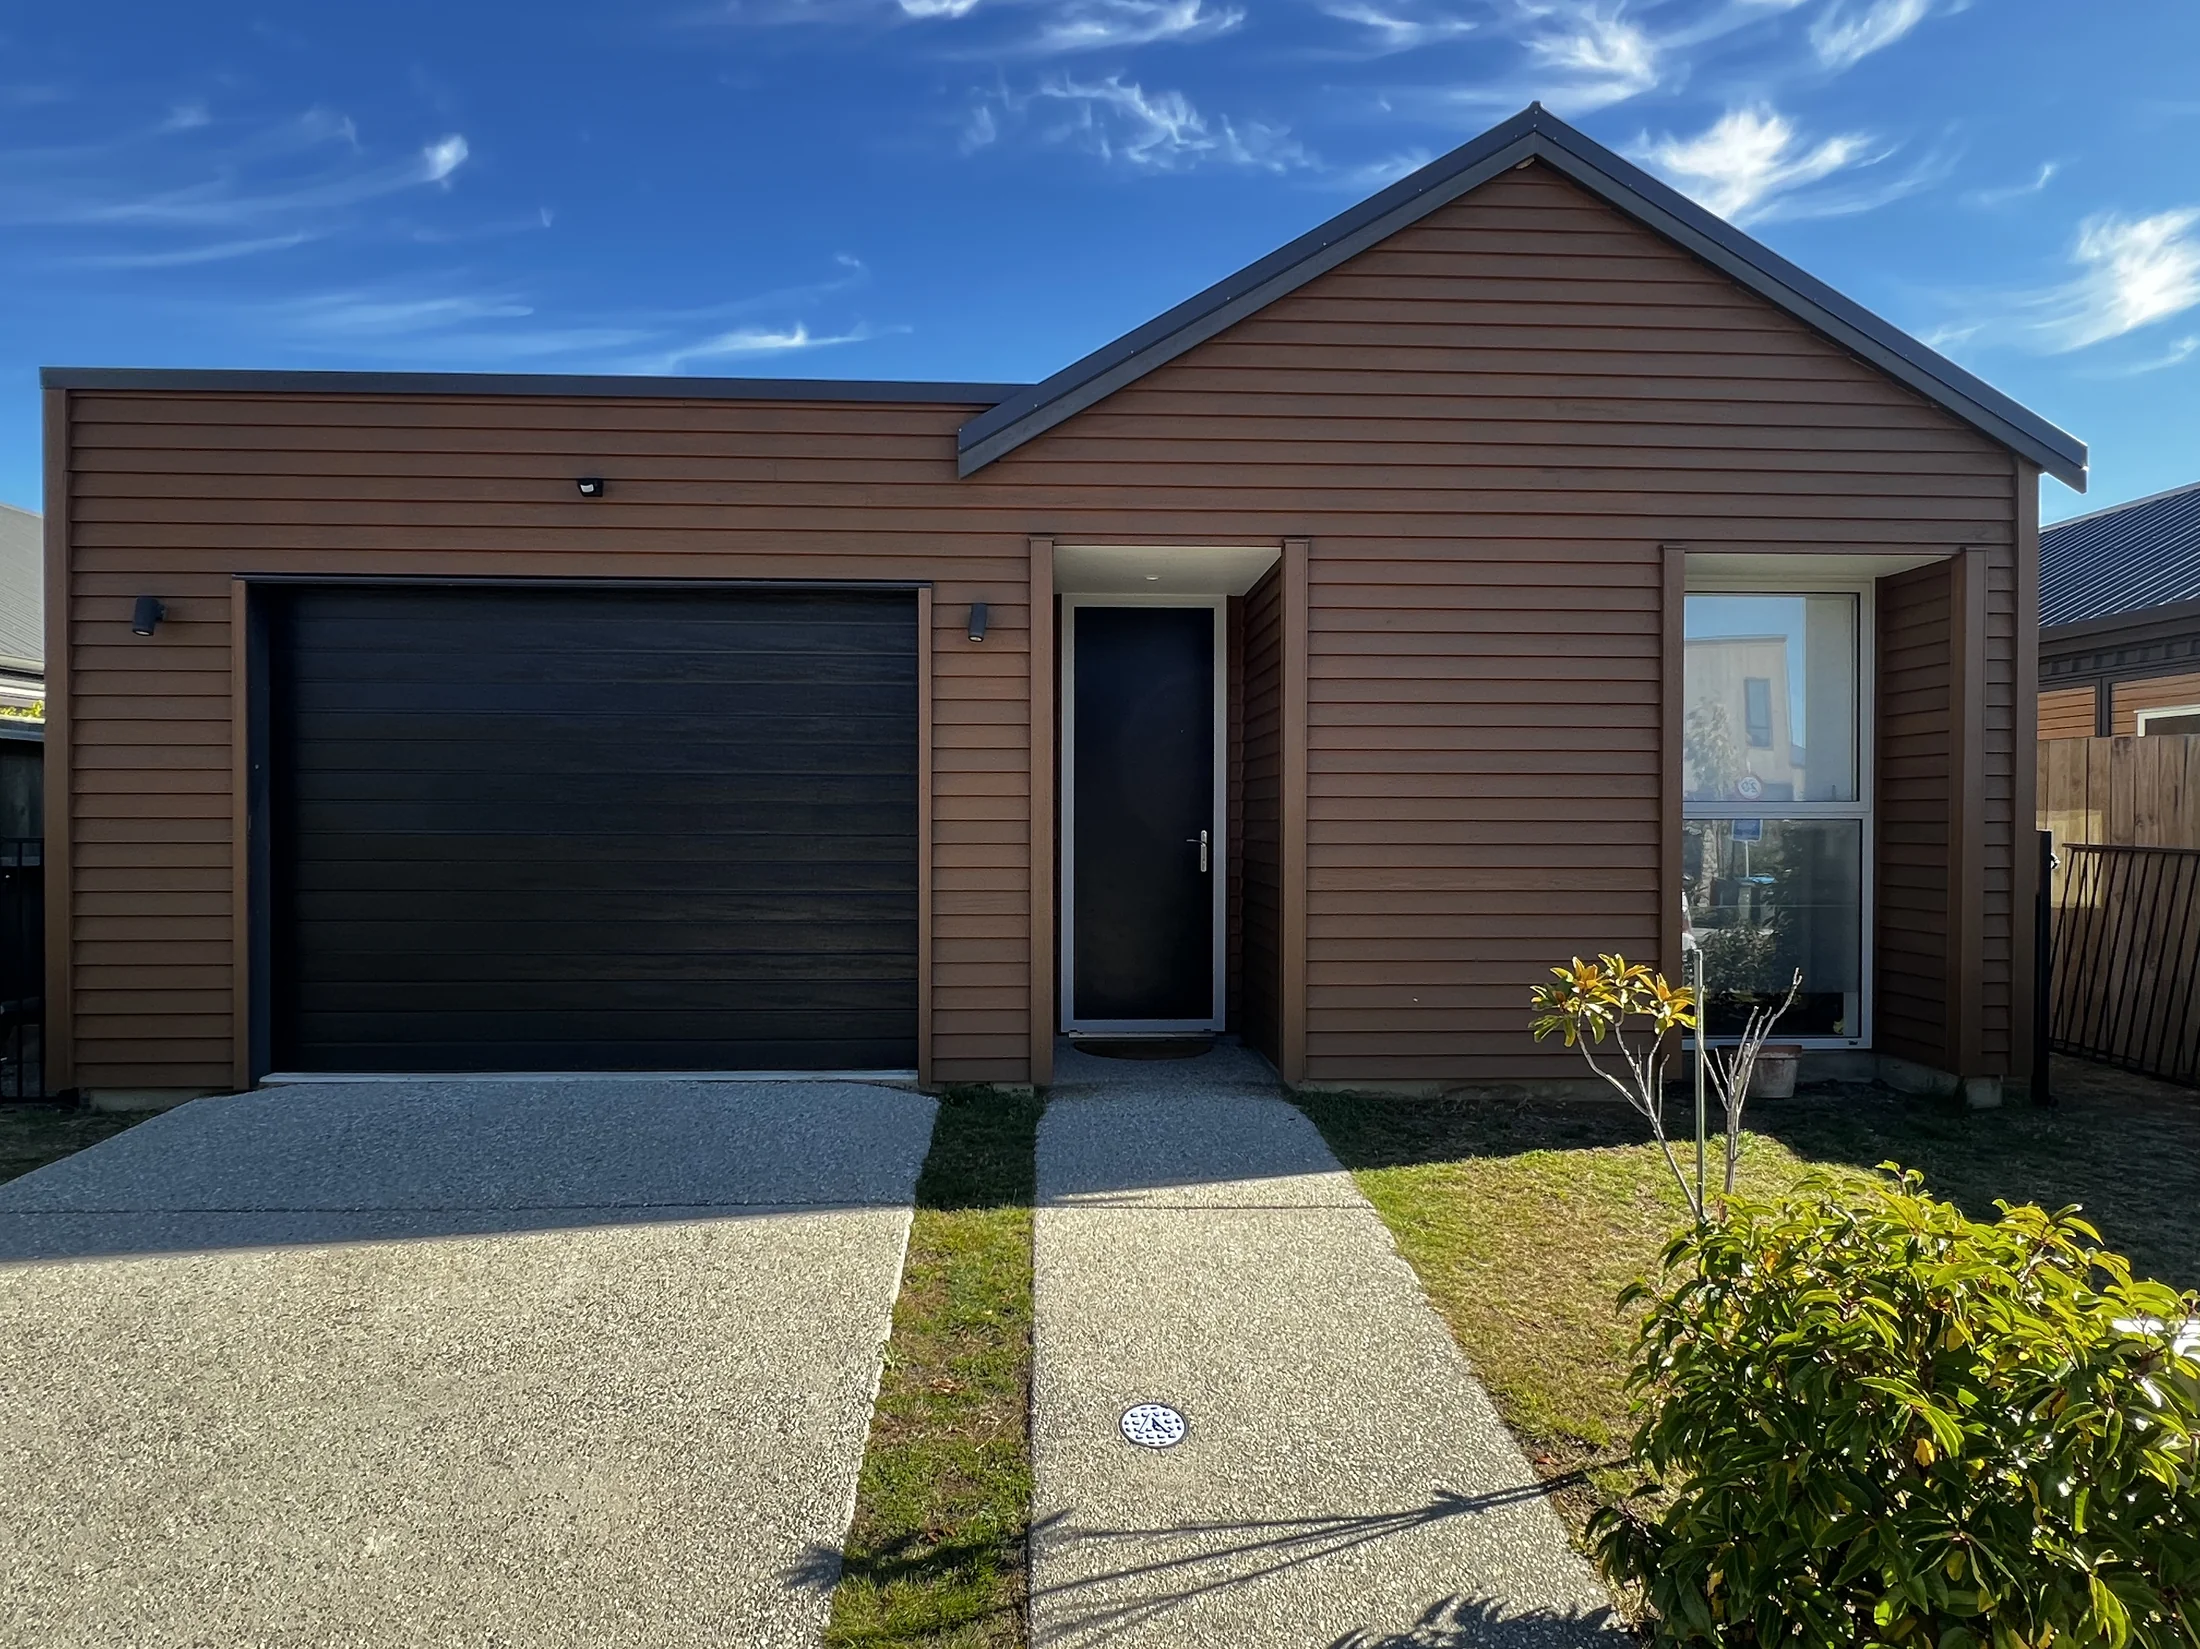
Result: a deep, even, warm tone across all four elevations. Total job time: three days. Total cost: under $3,000 incl. GST.
The owners have a coat of protection back on the timber and bought themselves another 2–3 years before they need to think about it again. If they'd left it another summer, we'd have been having a different conversation — once the stain's fully gone and the timber starts going silver, you can't just put another oil coat on top. You'd be back into restoration territory.
The lesson: if your cedar still has any of the previous stain holding on, and the boards aren't physically failing, a maintenance oil coat is almost always the right call. Don't wait for it to look terrible before you act.
Case 2: Full restoration, also in Northlake
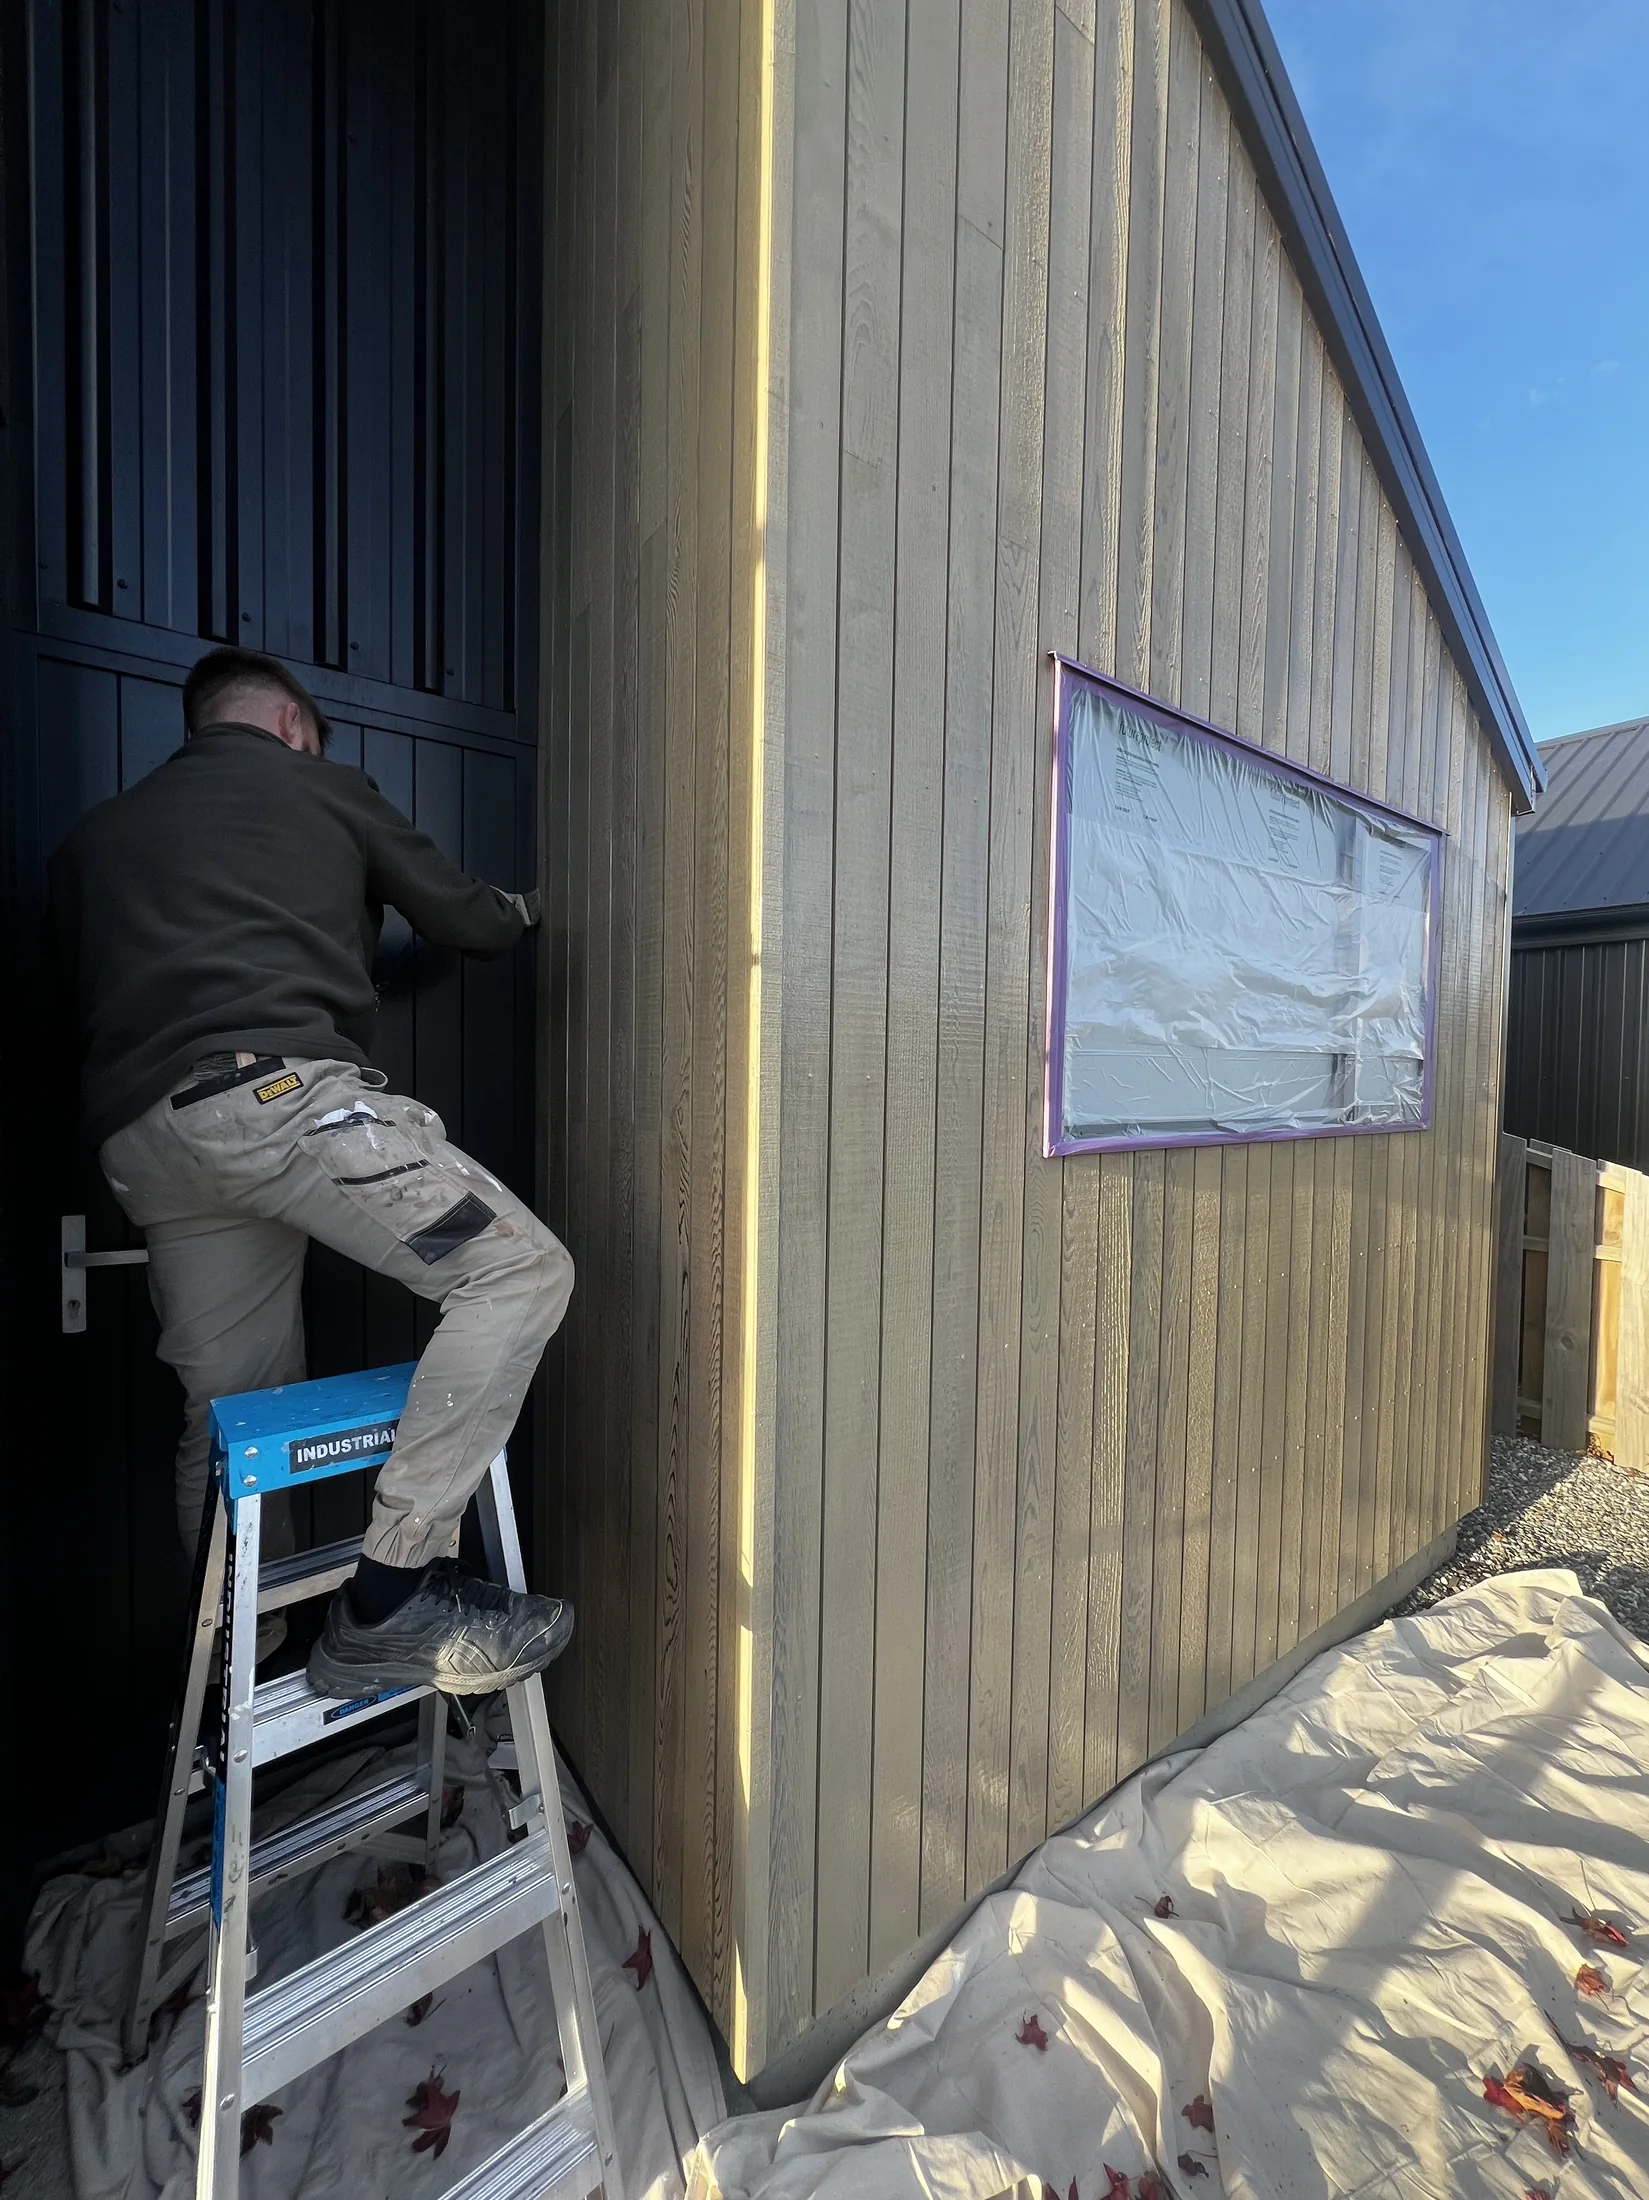
Same suburb, same vintage of home, completely different situation. This one had been coated with a film-forming stain — the wrong product for cedar in this climate. Over time it cracked and peeled, leaving the cladding looking patchy and tired.
That's the classic signature of a film-forming product that's failed. The coating sits on top of the timber like a skin — and once UV and moisture get under it, it lifts, blisters, and peels. You can see bare grey timber exposed in patches, and the surrounding stain is flaking away.
You absolutely cannot just put another coat over this. Anything you apply will sit on top of the failing layer underneath and fail with it within a season.
So we sanded the boards back to bare timber across most of the home, prepped around the windows and trim, then applied a penetrating exterior cedar stain that soaks into the wood rather than sitting on top.
Same suburb, similar conditions, but this job took roughly three times as long and cost the owners several times more than Case 1. Not because we did anything dramatically different — just because the prep work was a totally different scale. Sanding cedar back to bare timber, by hand, around windows and trim, takes days.
The lesson: if you're seeing peeling, blistering, or a flaking film on the surface, you're past the point of a refresh. Get a quote that includes proper preparation, and don't let anyone talk you into "just popping another coat on top" — it will fail and you'll pay twice.
This also doubles as a warning: product matters. The original installer used a film-forming stain on cedar that gets full UV exposure. That decision cost the owners a full restoration after just a few seasons. If you're staining cedar in Central Otago, use a penetrating oil stain. Every time. (For more on this, see our guide on restaining cedar coating compatibility.)
Case 3: When weathered grey is recoverable
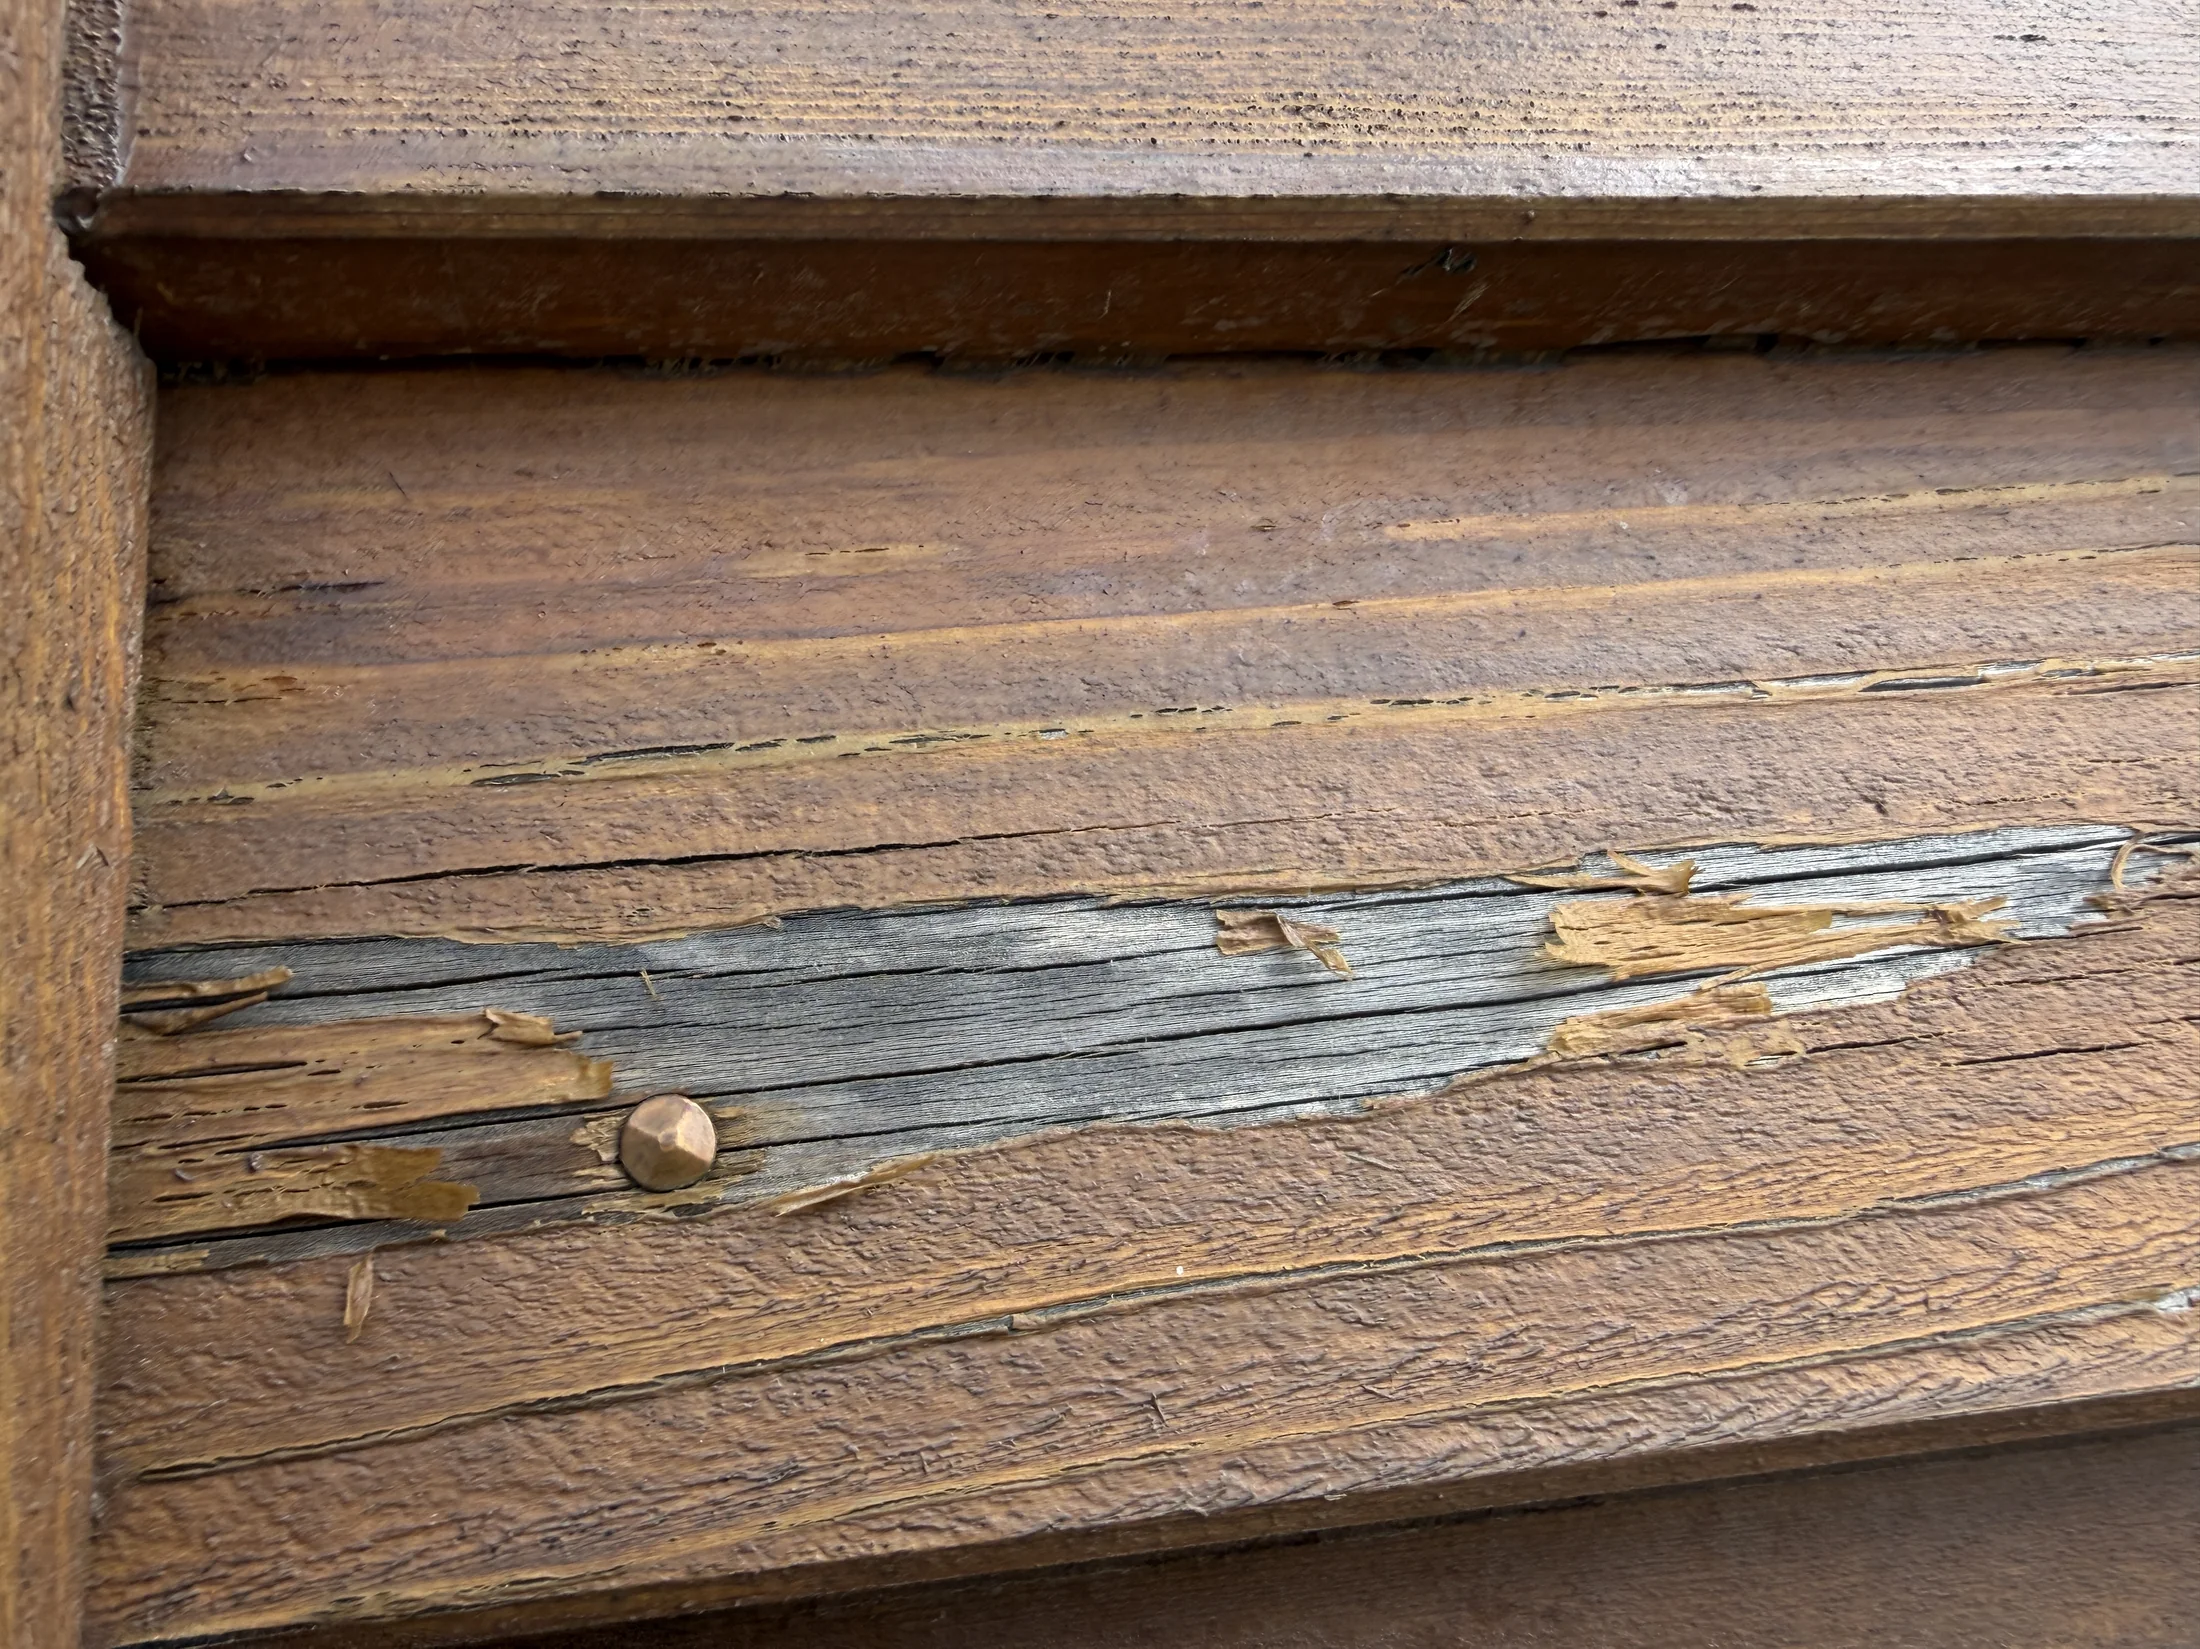
This Albert Town home sat somewhere in between — the cedar had weathered unevenly, with patchy greying around the entry. Not film-forming peeling like Case 2, but well past the point of a simple oil top-up.
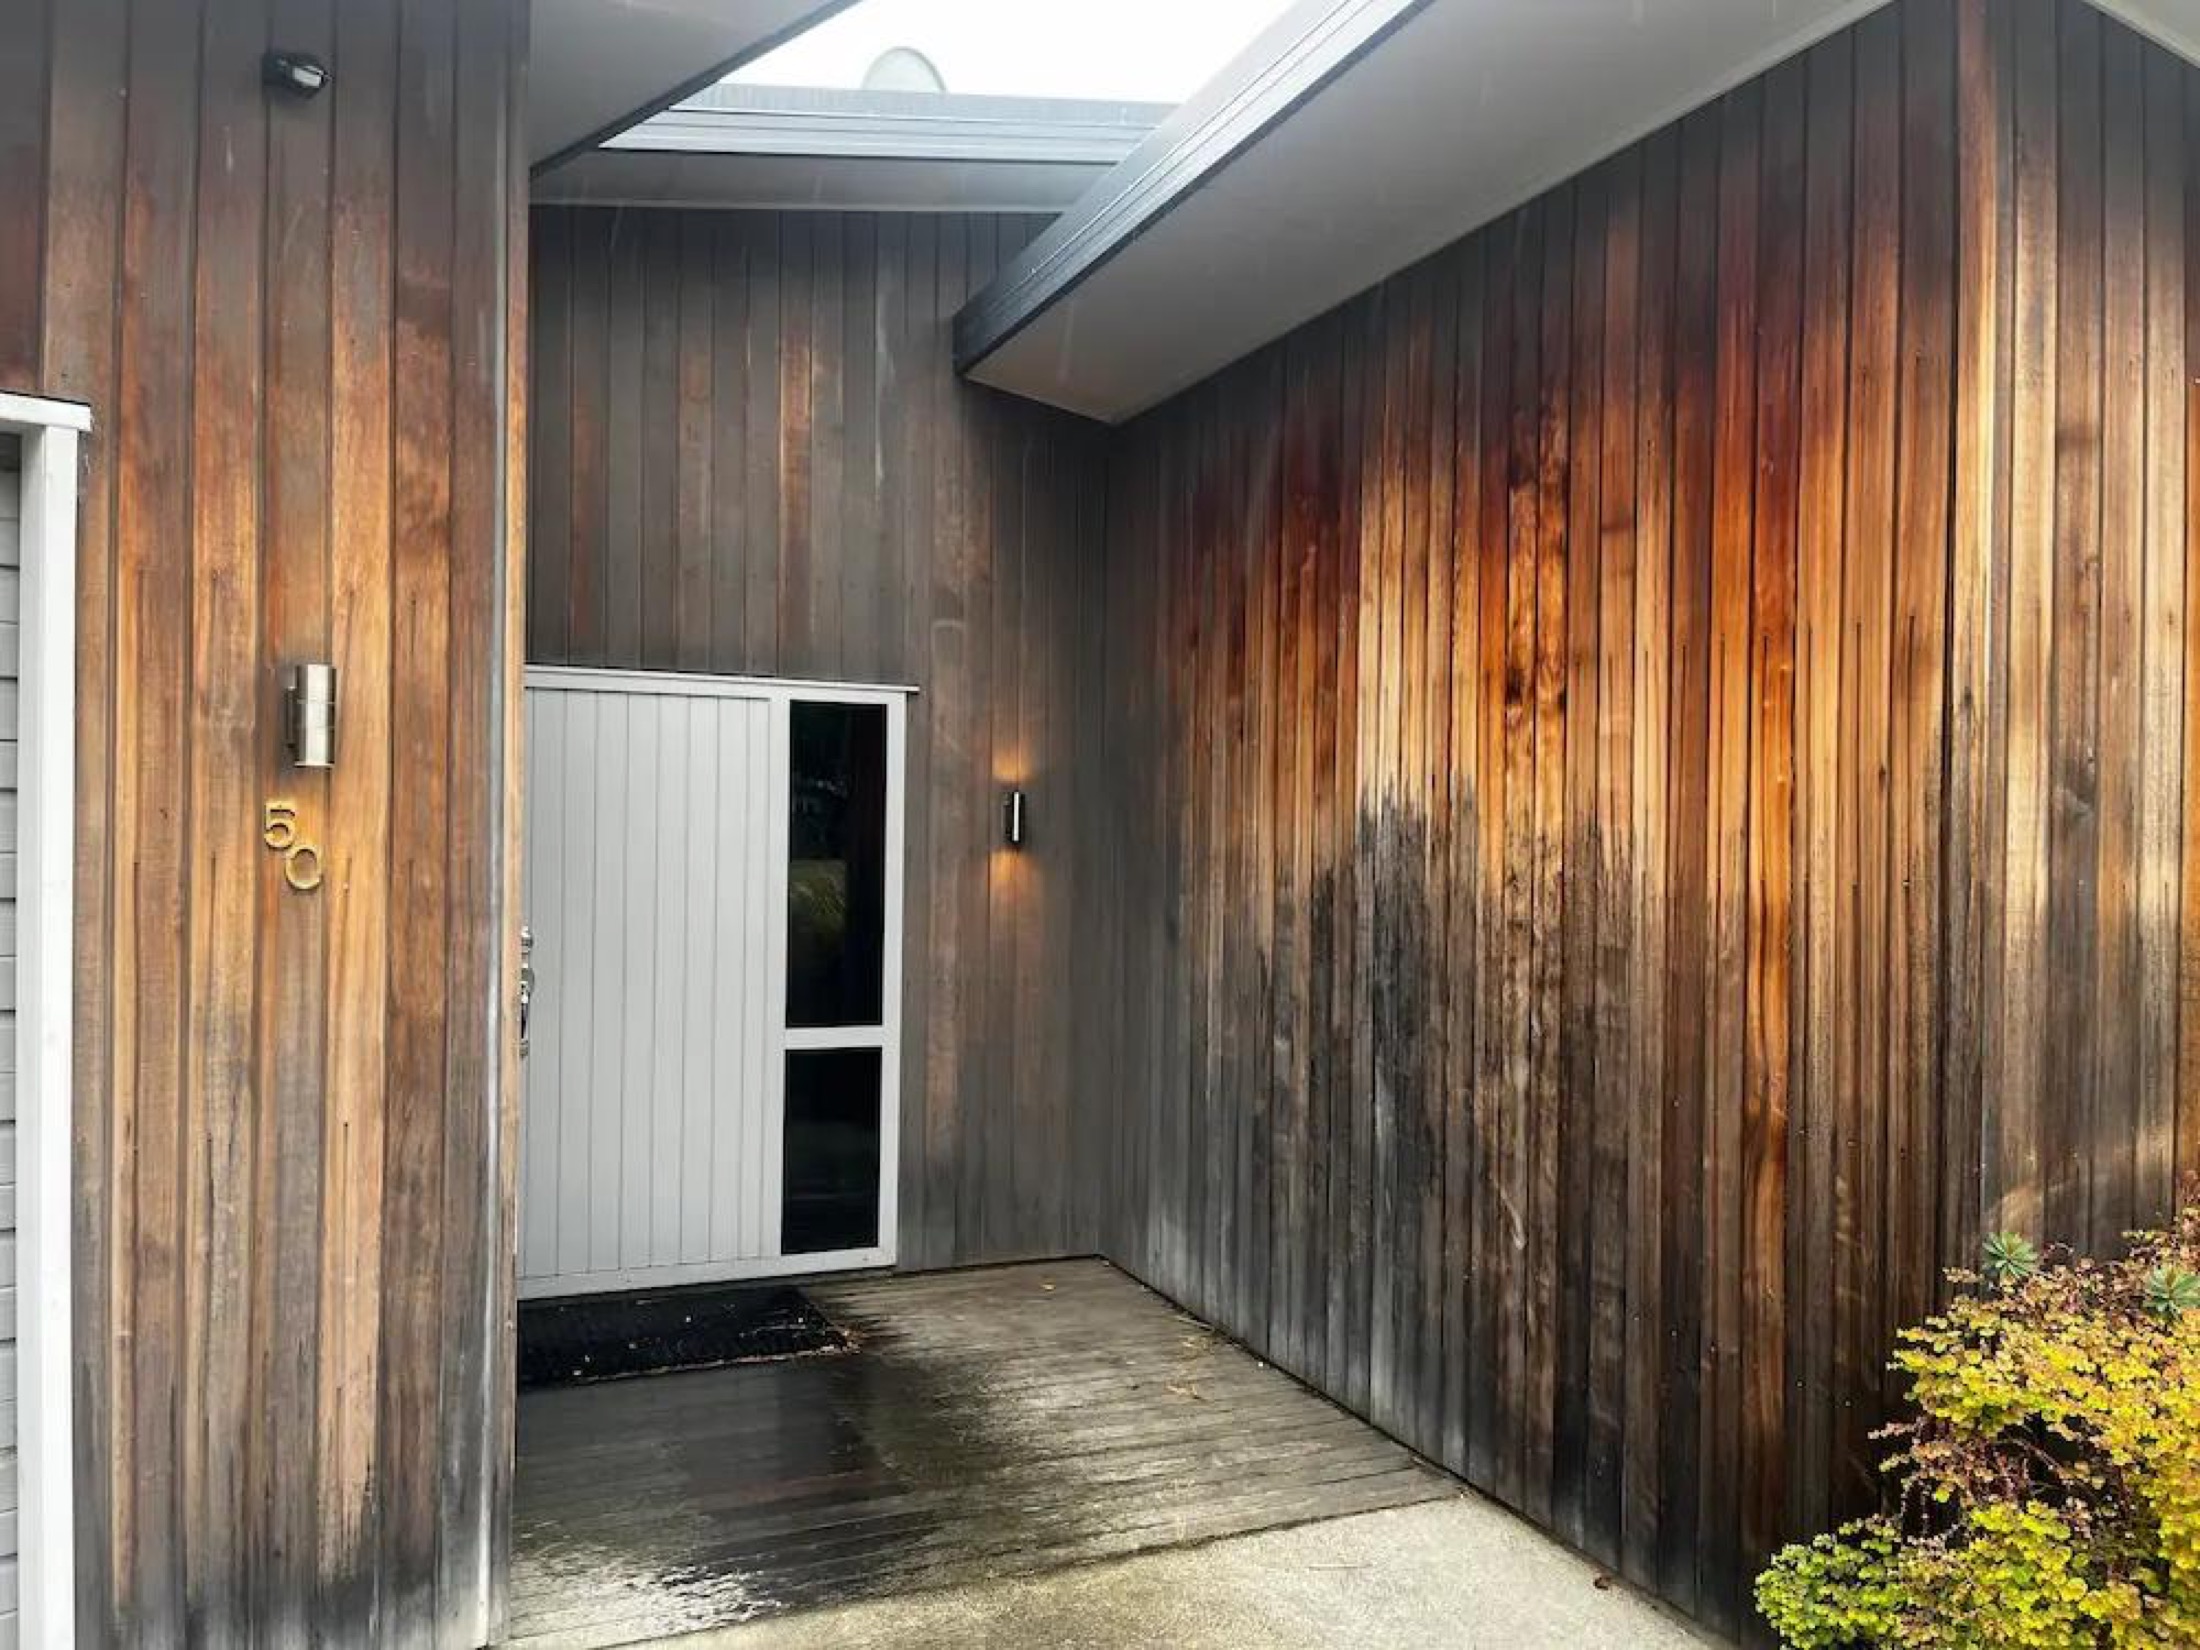
Notice the difference between this and Case 1. There's no obvious peeling, but the colour is genuinely gone in patches — the timber underneath has started to oxidise and grey. Once cedar has gone proper silver-grey, the surface fibres are damaged and a new coat of stain alone won't bond properly or look right.
For this one we did a full clean and prep, sanded the worst of the grey out, and built the colour back up with a deep penetrating stain.
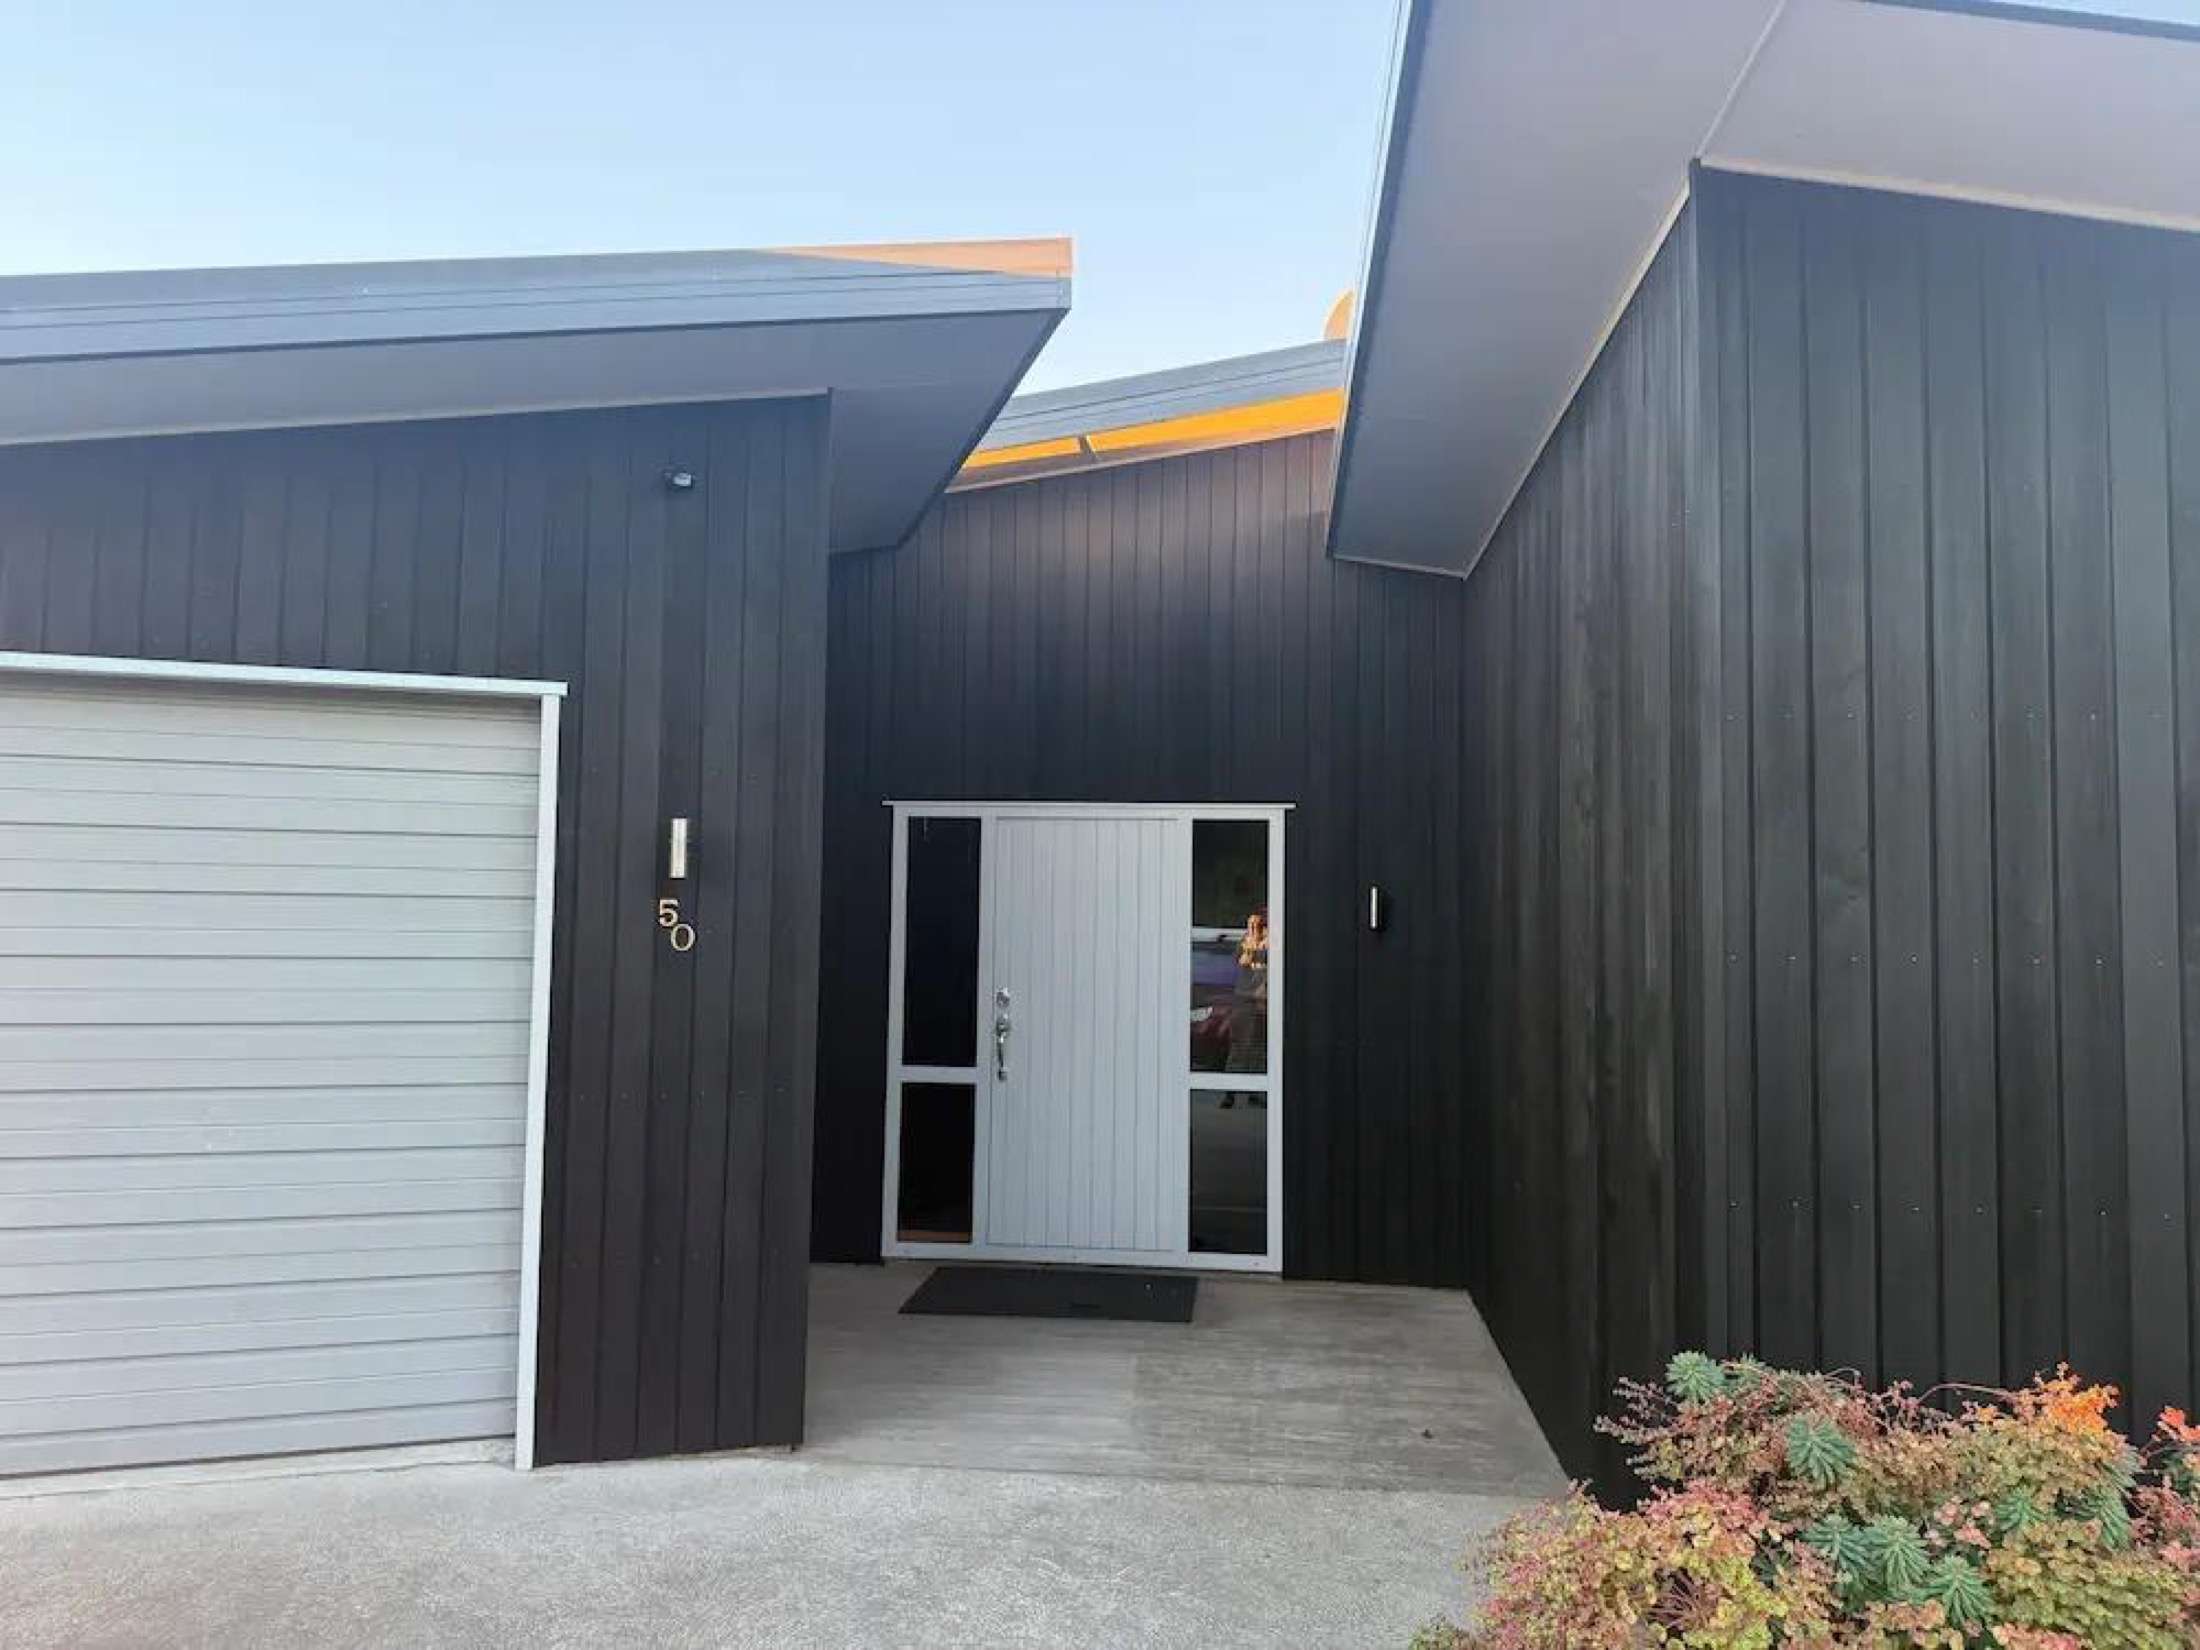
The transformation is dramatic — but it took the timber giving us a clean, prepped surface to bond to. If we'd skipped the prep and just applied a stain over the weathered patches, we'd have ended up with a blotchy, uneven finish that wouldn't last.
How to tell where your cedar sits — a quick checklist
Walk around your house with these in mind:
- Look at the most exposed elevations first. North and west-facing walls, especially gables and anything above first-floor height. They tell you the truth.
- Run your hand on the timber. Smooth and slightly waxy = stain still working. Dry, dusty, or fibrous = stain is gone.
- Check the colour. Is it just tired (faded but even)? Or are there patches where the colour has totally vanished?
- Look for film failure. Any peeling, blistering, cracking, or flaking flakes coming off in your hand? That's a film-forming product failing — you're in restoration territory.
- Check moisture marks. Black streaks under windows and gutter joins are usually fine. Black streaks running through the timber itself are not.
- The fingernail test. On a hidden corner, scratch lightly with your fingernail. If you peel up a little bit of stain, it's a film-forming product (and probably needs to come off). If nothing comes up, it's a penetrating stain.
If you're seeing tired-but-even cedar with no peeling, you're a refresh candidate. If you're seeing peeling or proper grey patches, you're a restoration candidate.
When to call us in
If you're not sure which one you're looking at — flick us some photos, ideally a wide shot of each elevation plus a close-up of any problem areas. We'll tell you what we'd do and what it'd cost, no obligation.
The worst thing you can do is leave it another summer hoping it'll sort itself out. Cedar doesn't get better on its own, and the gap between a refresh job and a restoration job is usually one or two more seasons of UV and rain.
Catch it at the refresh stage and you'll spend a few thousand dollars every few years to keep your cedar looking its best for the life of the home. Leave it too long and you're looking at restoration costs every time — for the same finish.
If you're in Wānaka, Northlake, Albert Town, Lake Hāwea or anywhere else in Central Otago and want a no-pressure quote on your cedar, get in touch. We'll come and give you an honest read on what your cedar actually needs.

About the Author
Bradley Hamilton
Bradley Hamilton has been staining and restoring cedar across Central Otago for 15 years. From maintenance oil refreshes in Northlake to full strip-and-restains in Albert Town, he's worked through every product on the market in this climate and writes about what actually holds up.
Comments
Join the conversation by signing in
No comments yet.
Be the first to share your thoughts!