
Bradley Hamilton
Lakeside Painting
Cedar cladding is one of the most popular exterior finishes in New Zealand — and for good reason. It looks great, it's durable, and when it's maintained properly it can last decades. But restaining cedar isn't always as simple as washing it down and slapping on a fresh coat, especially when the previous coating has started to fail.
We recently worked on a cedar-clad home in the Queenstown Lakes district that taught us some hard lessons about coating compatibility — and we reckon every homeowner with a cedar house should know about them.
The Job: What We Expected
The homeowner wanted her cedar cladding restained. The existing coating was breaking down in places, particularly on the sun-exposed elevations, and the timber needed protection before another Central Otago winter hit.
Our plan was straightforward: wash the cladding, sand the worst areas, feather out any sections where the old coating was lifting, and apply a penetrating oil stain over the top. On the sheltered side of the house, where the old coating was still reasonably well adhered, this approach is perfectly standard.
What We Actually Found
Once we started sanding and doing test patches, things got complicated.
The previous coating turned out to be a film-forming water-based stain — the type that sits on top of the timber surface rather than soaking into the grain. On the sheltered elevations this wasn't a major issue, because the film was still intact and well bonded. We sanded it lightly, tested our oil stain over it, and it adhered fine.
But on the north and west-facing sides — the ones that cop full sun for most of the day — the story was completely different.
The old film-forming stain had broken down badly. It was peeling away from the timber in sheets, and where it was still clinging on, it was only loosely adhered. The UV had done serious damage.
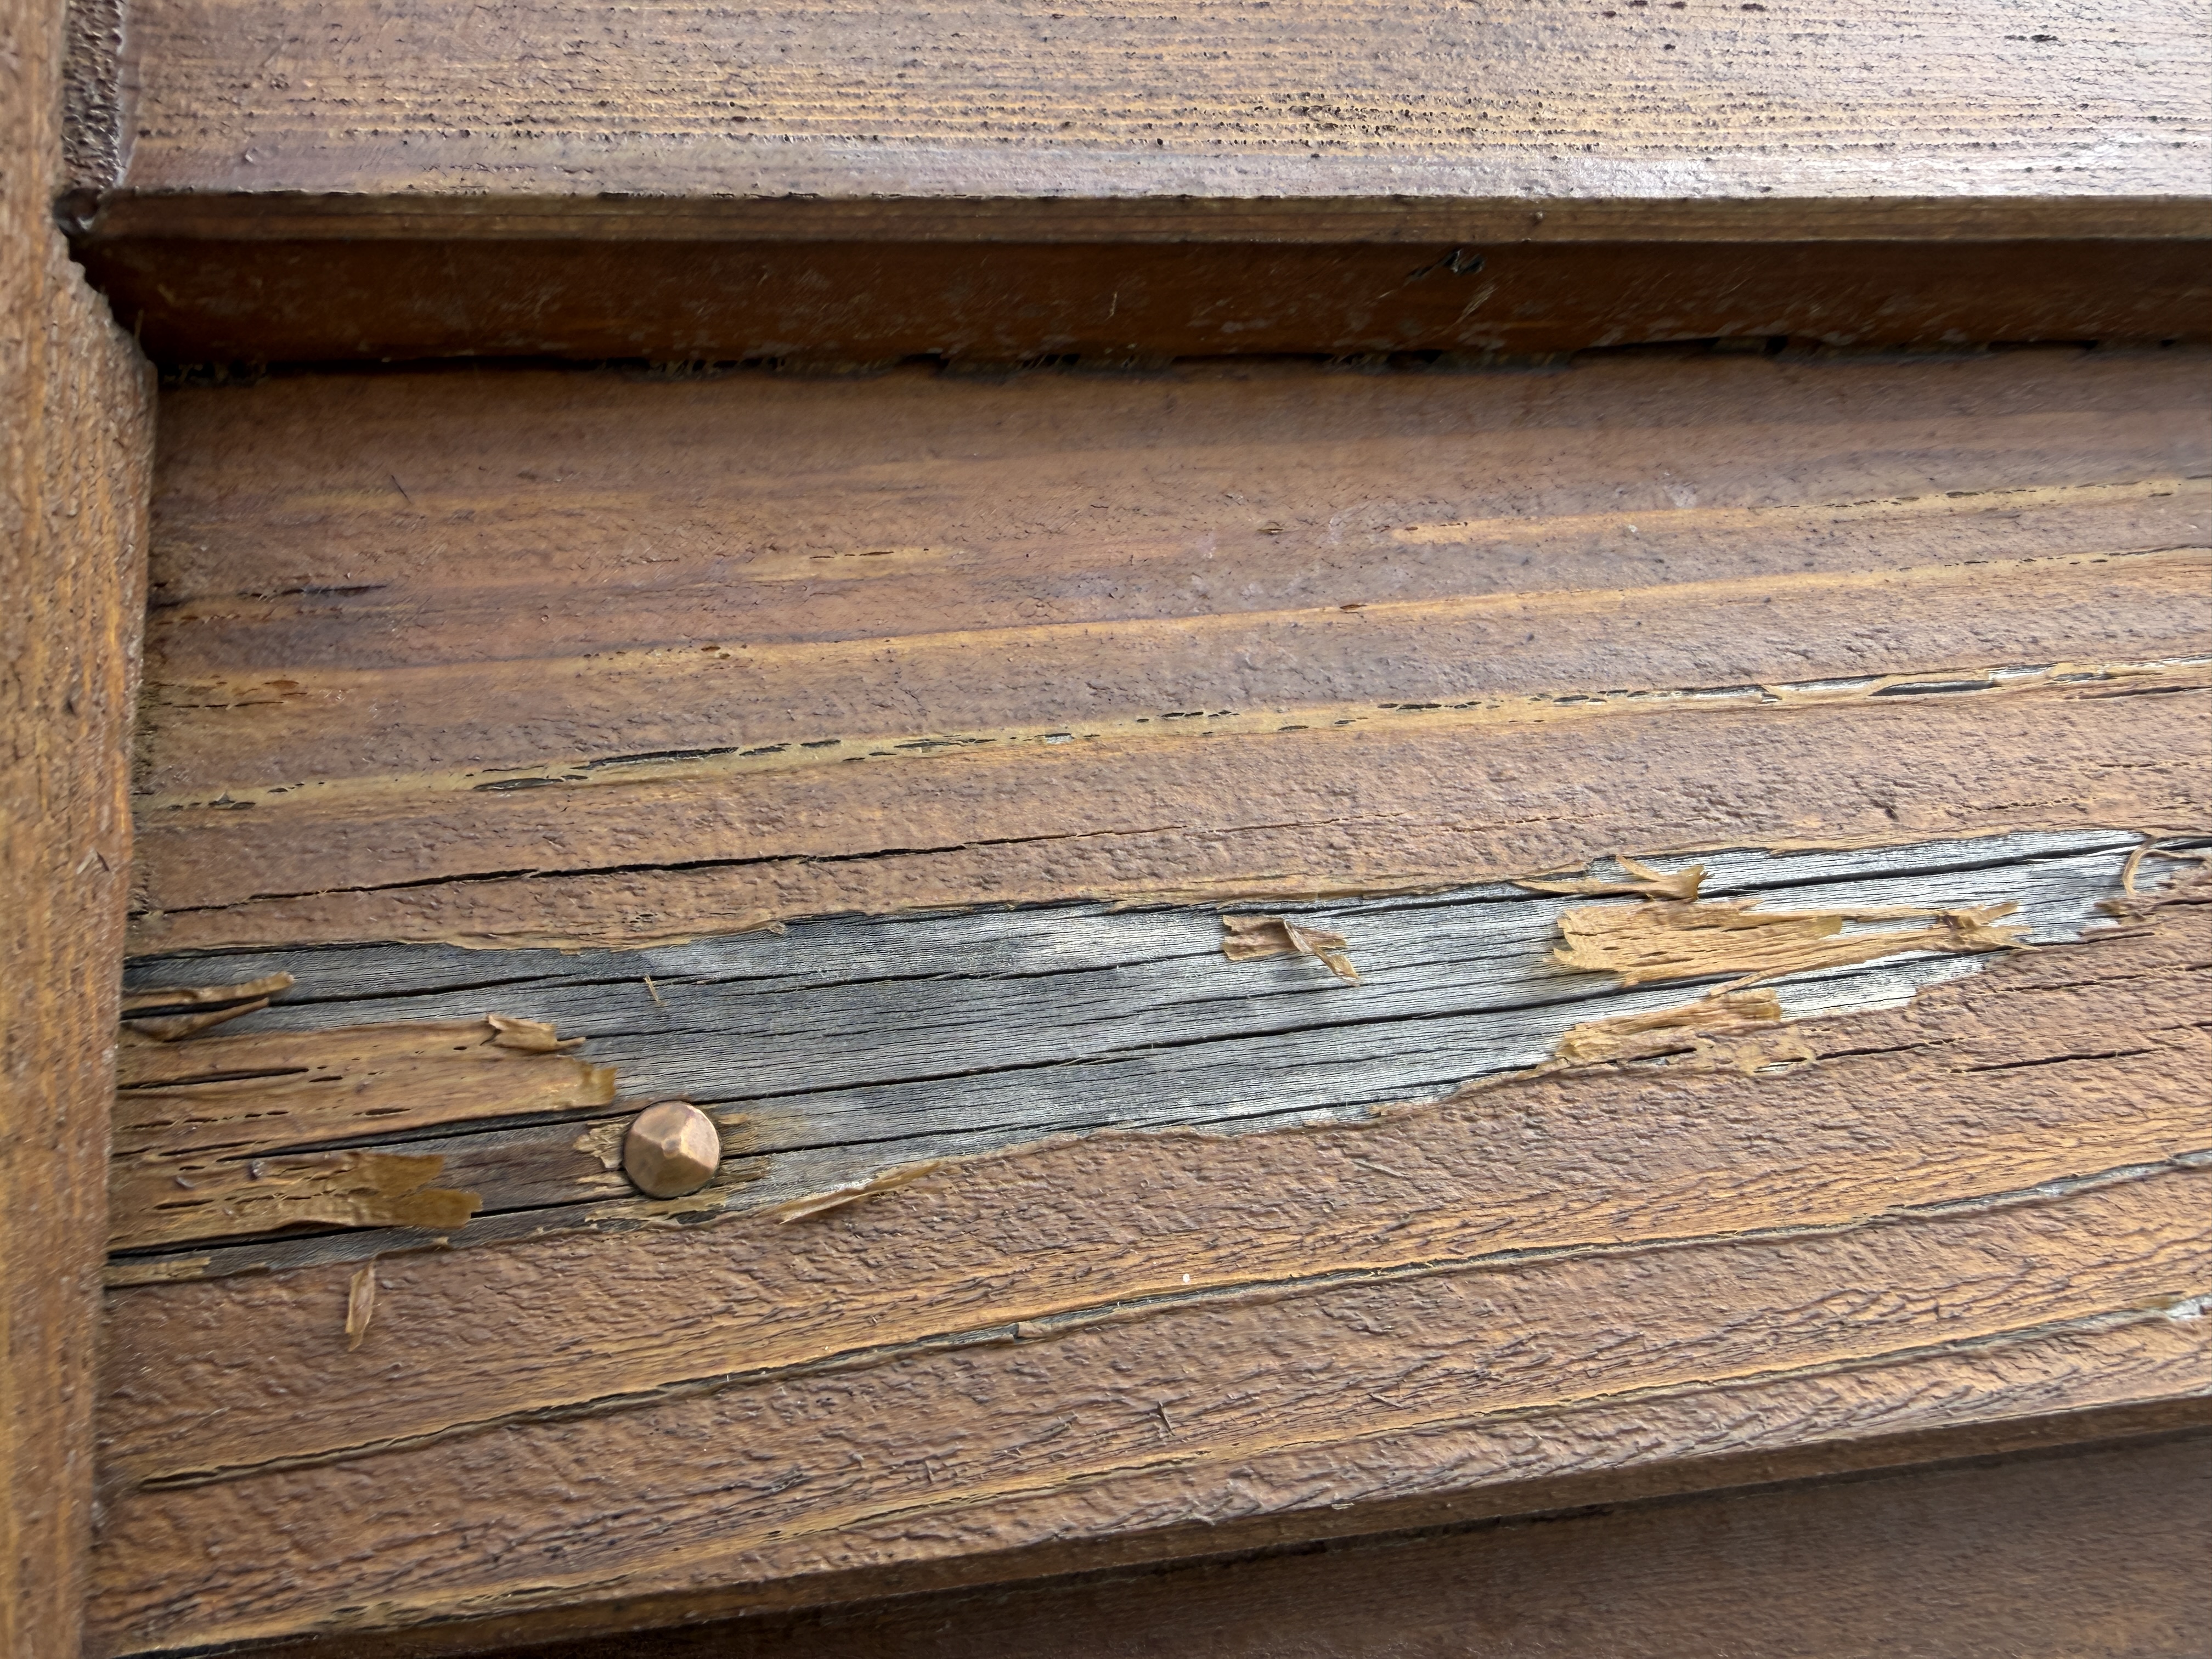
When we tested our oil stain over those areas — even after sanding and feathering out the loose material — the oil reacted with the residual old coating. Instead of penetrating into the timber, it caused the old product to bubble and lift. The two systems simply weren't compatible.
Why This Happens
This comes down to a fundamental difference between the two types of cedar stain.
Film-forming stains (usually water-based) sit on the surface of the timber like a thin paint film. They look great initially and are easy to apply, but over time — especially on sun-exposed surfaces — UV breaks down that film. Once it starts to crack and peel, moisture gets underneath and accelerates the failure. When the time comes to restain, you're not just dealing with weathered timber — you're dealing with a partially failed coating system that needs to be removed before anything new can go on.
Penetrating oil stains soak into the timber grain rather than forming a film on top. They wear gradually and evenly over time, and when it's time to recoat, you generally just need to clean the surface and apply another coat. No film to crack or peel.
The problem arises when you try to put a penetrating oil over an old film-forming product. The oil can't get through the residual film to reach the timber, so it sits on top, reacts with the old coating, and fails. Even heavy sanding doesn't always solve the problem if the old product has worked its way into the grain.
What We Had to Do
On the sheltered elevation, the lighter prep approach worked fine. But on the sun-damaged sides, we had no choice but to sand the cladding right back to bare timber — removing as much of the old film-forming product as possible before applying the oil system.
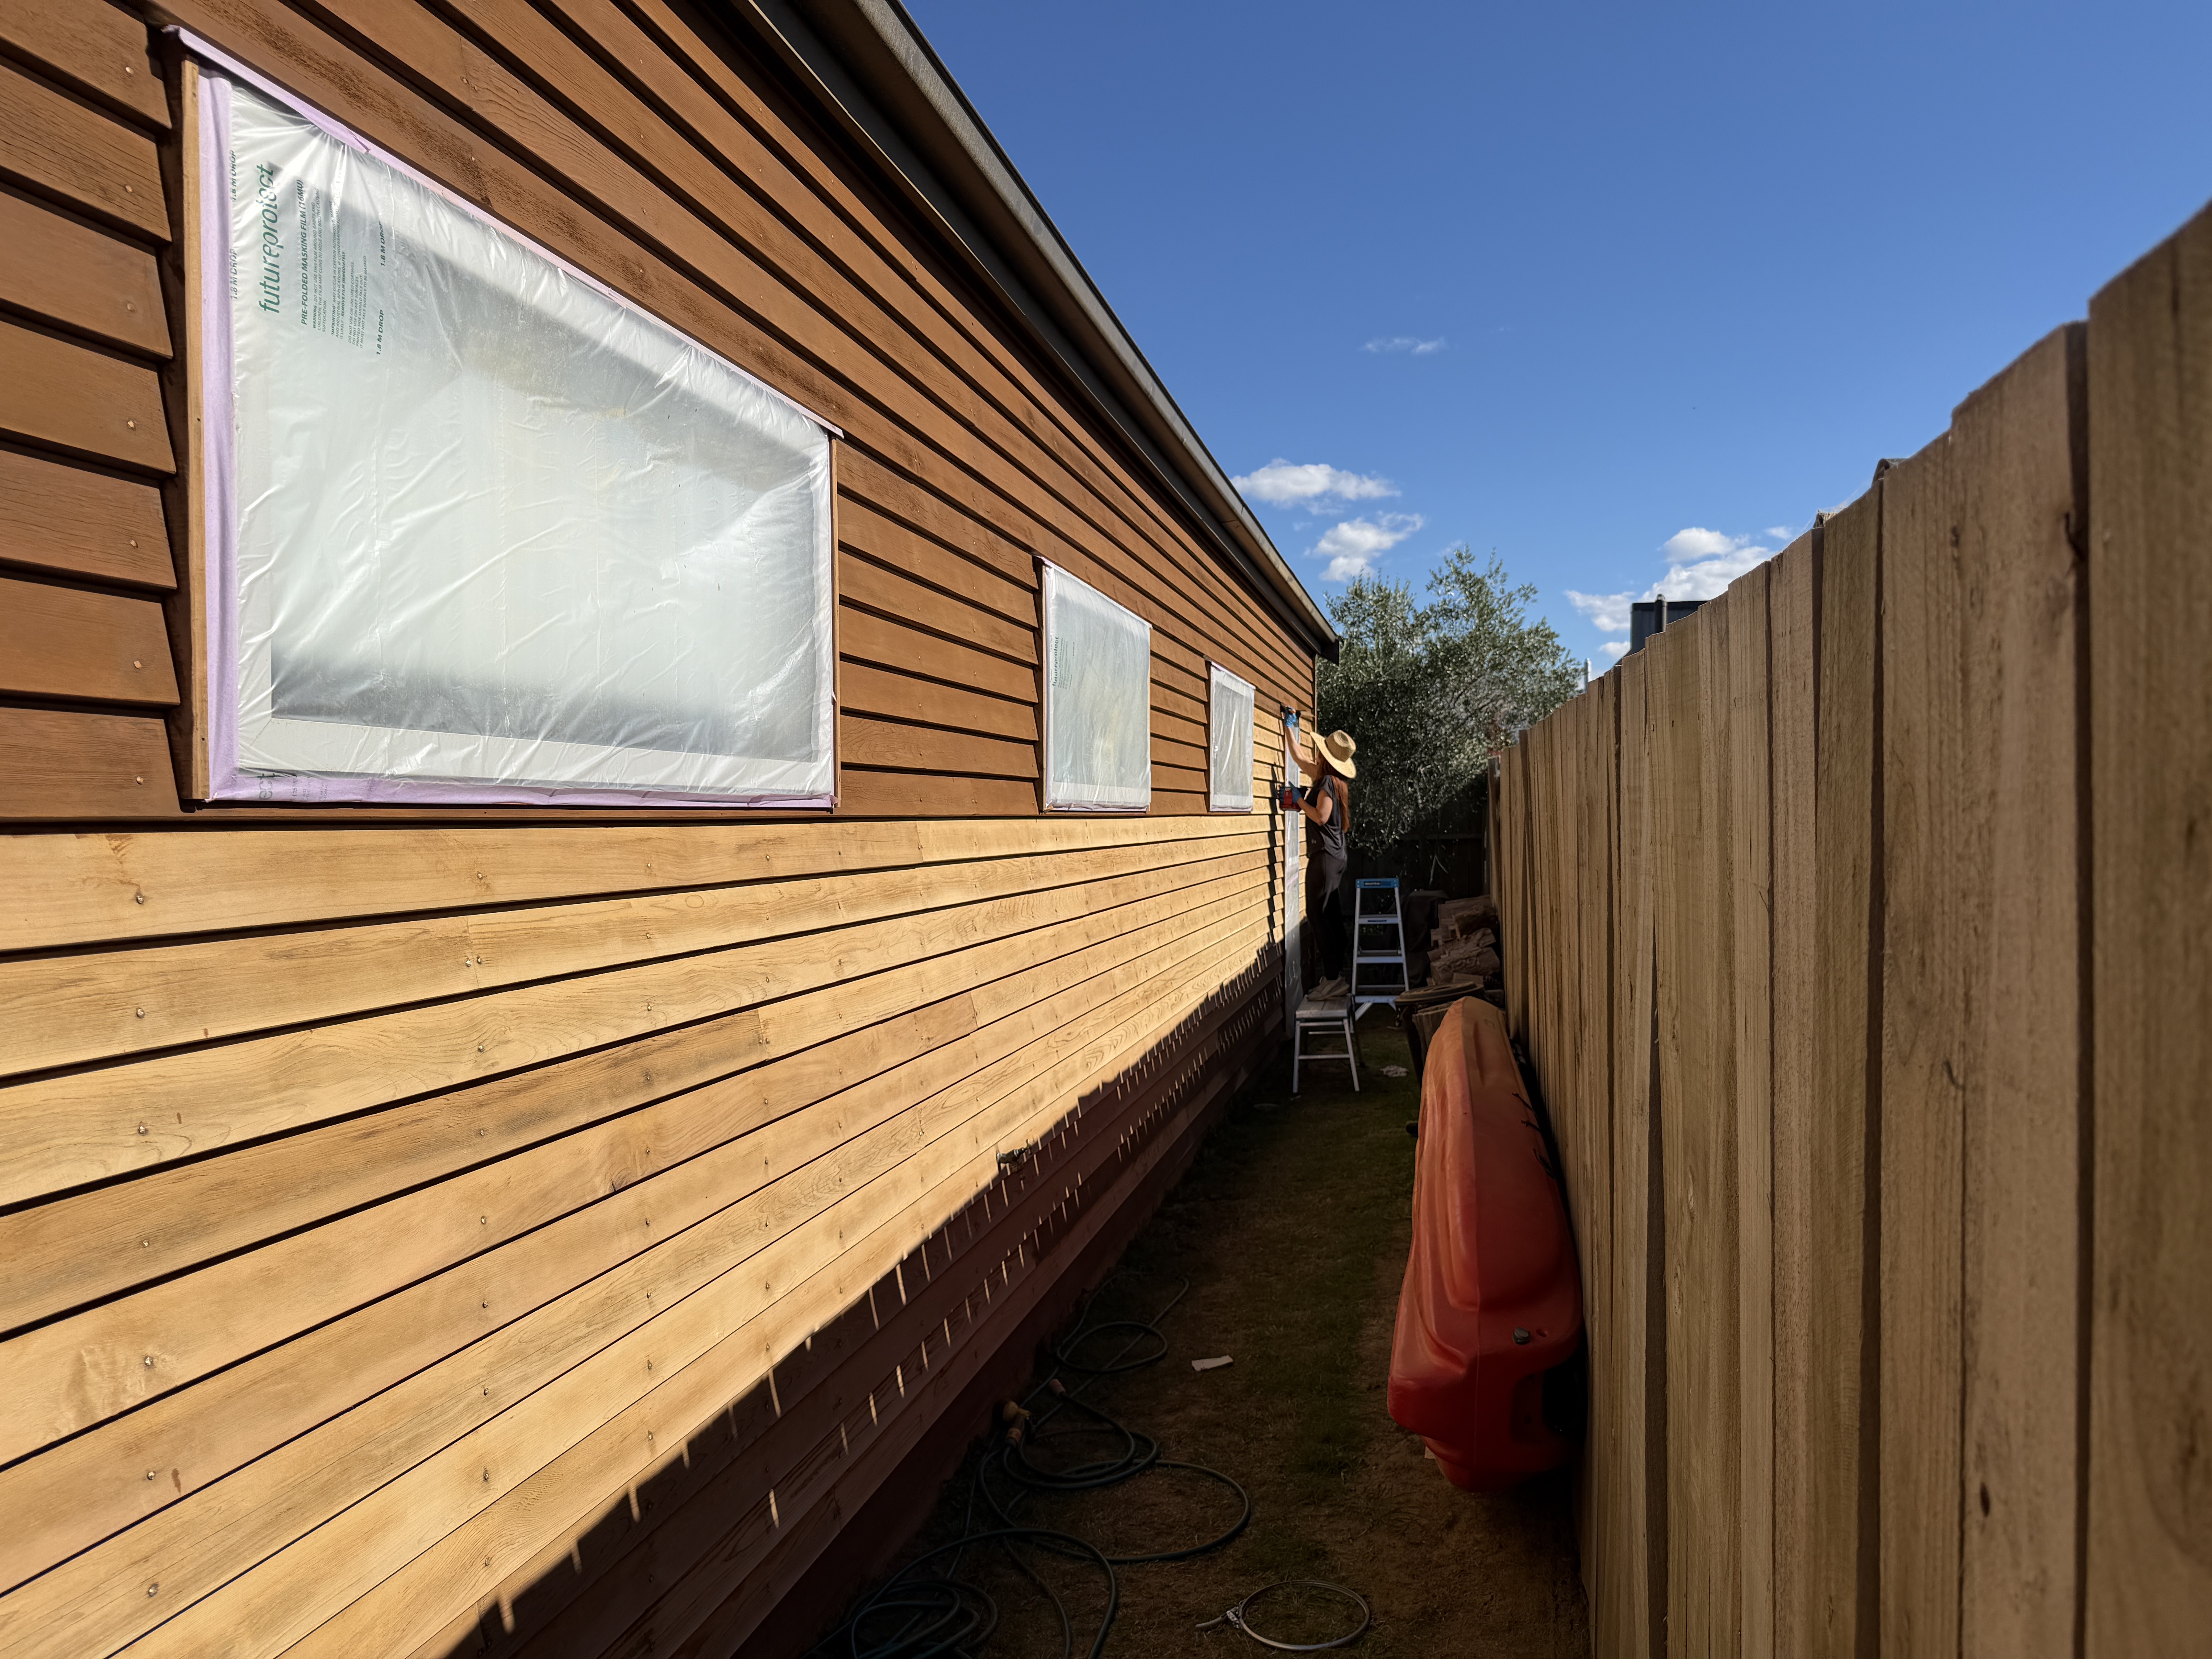
This was significantly more work than what we'd originally planned for. Each board had to be sanded individually, and even then, some residual old product remained in the grooves and rebates of the weatherboard profile where a sander can't easily reach.
Hard, physical work — but the only way to ensure the oil would bond properly and give the homeowner a finish that would actually last.
The Honest Takeaway
Could we have avoided the strip-back by sticking with a compatible water-based stain instead of switching to oil? In theory, yes. But on this property, one full elevation was in direct sun all day — and the old film-forming stain had already failed well ahead of schedule. That tells you how these products cope with Wanaka's UV. Going back with the same system would mean more frequent recoats on the exposed sides, and the moment you fall behind, you're right back to peeling and a full strip.
We believe switching to oil was the right call. Both systems need maintenance in this climate, but with oil the recoat is simple — wash it down and apply another coat. With a film-forming product that's starting to lift, you're back into sanding and prep territory each time. That difference adds up fast.
The takeaway: it matters what's already on your cedar, and it matters even more what condition it's in. In a high-UV area like Wanaka or Queenstown, film-forming stains break down faster than most people expect — and that changes the maths on which system actually costs less over time.
What Homeowners Should Know Before Getting Cedar Restained
1. Find out what's on your cladding before committing to a restain. Get your painter to do a test patch first. A small test area can reveal compatibility issues before they become expensive problems.
2. Don't judge the whole house by the sheltered side. North and west-facing elevations cop far more UV and will always be in worse shape.
3. Film-forming stains break down faster than you'd expect in high-UV areas. Once they start to crack and peel, the prep cost for restaining multiplies.
4. Switching to oil is more work upfront, but easier to maintain long-term. Recoating oil is a wash and reapply. Recoating a failing film-forming stain means sanding and prep all over again.
5. If you're starting fresh, go oil. Whether it's a new build or a strip-back to bare timber, penetrating oil is the better system for cedar in harsh UV climates. It wears gracefully and won't peel.
The Bottom Line
Cedar looks great, but it doesn't look after itself. The longer you leave a failing coating, the more it costs to fix. If you're not sure what's on your cladding or what condition it's in, get someone to take a look before it becomes a bigger job than it needs to be.
Got cedar in the Queenstown Lakes or Central Otago area? Painters Wanaka — honest assessments, no surprises.
This post is based on a real job carried out by Lakeside Painting Limited in the Queenstown Lakes district. Photos are from the actual project.
The author also runs Lakeside Painting, a professional painting company serving the Central Otago region.

About the Author
Bradley Hamilton
Bradley Hamilton is a seasoned painter with over 14 years of experience in the industry. Having worked with a wide range of clients, from homeowners to commercial businesses, he has developed a deep understanding of what it takes to deliver exceptional painting results. His expertise spans both interior and exterior projects, with a focus on quality craftsmanship and attention to detail. Now combining his passion for painting with his skills in web development, Bradley helps painting businesses build a strong online presence, sharing valuable insights and tips to help improve their services and grow their customer base.
Comments
Join the conversation by signing in
No comments yet.
Be the first to share your thoughts!